Note Deal Analyzer Documentation
Current WEB product
The current product runs in the browser. Register or Log in, then open the app.
- Register or log in.
- Enter a PN Senior or PN Junior deal, or import a Paperstac or JKP file.
- Activate the included starter analysis with Stripe card verification. Card verification does not charge the card. Then Calculate. One successful PN1 or PN2 Calculate uses one credit.
- Review Results: charts, schedule, payment analysis, exit scenario, seasoning, and risk.
- Save the deal, compare calculated deals, or export a PDF or Schedule CSV. Import, Deal Center browsing, Save, and those exports do not use a credit.
Paid packs are purchased from Credits after you have an account: 1 for $19, 3 for $49, 5 for $75, and 10 for $119.
Legacy desktop reference
The sections below describe the earlier Windows and Mac desktop apps, including Microsoft Store, Mac App Store, and Lemon Squeezy license activation. They remain here for people who already use those apps. New analysis starts in the web app. The screenshots in this manual are the earlier desktop screens.
Customer instruction manual for the desktop app: navigation, activation, importing, analysis, saving, and PDF reports.
| Important credit rule 1 successful PN1 or PN2 Calculate = 1 credit. Save Deal, PDF Export, Import, Deal Center browsing, Credits Refresh, and opening saved results do not use a credit. |
|---|
1. What NoteDealAnalyzer Is
NoteDealAnalyzer is desktop software for reviewing mortgage note deal information. It helps you organize imported or manually entered deal data, run PN Senior and PN Junior calculations, review deal metrics, save analysis results, and export PDF reports.
Back to top2. Before You Start
- Make sure you have an internet connection for license activation, in-app purchase, and credit updates.
- Windows: have your valid NoteDealAnalyzer license key ready, then activate the license before running calculations.
- macOS: install from the Mac App Store. Purchase credits inside NoteDealAnalyzer → Credits using Apple In-App Purchase. Do not use the website checkout.
- Prepare your deal information or import file before starting analysis.
3. How the App Is Organized
The app is organized in layers. You normally start from Home, move into the correct module, and then continue through the deal workflow.
| App area | What it means | Use it for |
|---|---|---|
| Home | Main starting point / main menu | Open the main areas of the app. |
| Credits | License activation, in-app credit purchase, and credit balance | Activate a Windows license, buy Mac credits in the app, and check remaining credits. |
| Import | Load external deal files | Bring in Paperstac or JKP files, review rows, and move selected rows to All Registry. |
| Deal Center | Central place to find imported, saved, and analyzed deals | Open deals, review queues, and continue analysis. |
| All Registry | Full deal list | See all saved/imported deals in one place. |
| PN1 / PN Senior Queue | Senior note workflow | Open senior deals for PN Senior analysis. |
| PN2 / PN Junior Queue | Junior note workflow | Open junior deals for PN Junior analysis. |
| PN Input screen | Assumptions and deal fields | Review or enter inputs before calculation. |
| Results screen | Appears after successful Calculate | Review metrics, charts, schedules, ratings, and deal status. |
| PDF Export | Report output from results | Save a PDF report after reviewing results. |
| Data Safety | Backup and data protection | Create backups and review restore guidance. |
| Normal app flow Import or PN Input -> Deal Center / PN queue -> Calculate -> Results -> Save Deal / PDF Export |
|---|
4. Main Workflow Paths
Path A: Import a File and Analyze a Deal
- Home -> Import.
- Choose Paperstac or JKP.
- Load the source file.
- Review preview rows.
- Select rows.
- Import selected to All Registry.
- Deal Center -> All Registry / PN1 Queue / PN2 Queue.
- Open selected deal.
- Review PN Input fields.
- Calculate.
- Review Results.
- Save Deal.
- Export PDF Report if needed.
Path B: Manually Enter and Analyze a Deal
- Home -> PN.
- Choose PN Senior or PN Junior if applicable.
- Enter required fields.
- Review assumptions.
- Calculate.
- Review Results.
- Save Deal.
- Export PDF Report if needed.
Path C: Reopen or Continue a Saved/Imported Deal
- Home -> Deal Center.
- Open All Registry, PN1 Queue, or PN2 Queue.
- Refresh if needed.
- Select deal.
- Open selected deal.
- Review saved results or continue analysis.
Opening saved results does not use a credit.
Back to top5. Screen Guide
| Screen | What this screen is | How you get there | What you can do there | What comes next | What not to do there |
|---|---|---|---|---|---|
| Home | The main starting point. | Open the app or use Home from the top navigation. | Open PN, Import, Deal Center, Credits, or Data Safety. | Choose the module that matches your task. | Do not expect Home to show detailed deal records or calculation results. |
| Credits | License activation, in-app credit purchase, and credit balance. | Click Credits. | Windows: enter License Key, Activate, Refresh, and review credit fields. macOS: buy a credit pack with Apple In-App Purchase, then review credit fields. | Go to Import, Deal Center, or PN. | Do not use Credits to enter deal data or run analysis. |
| Import | File intake and preview. | Click Import. | Load source files, review rows, select rows, inspect rows, and import selected rows to All Registry. | Go to Deal Center. | Do not use Import as the final analysis screen. |
| Deal Center | Central deal workspace. | Click Deal Center. | Open All Registry, PN1 Queue, PN2 Queue; refresh, filter, and open deals. | Open a deal into PN Input or saved Results. | Do not run calculations directly from Deal Center. |
| PN Input | Assumptions and deal fields. | Open PN or open a deal from Deal Center. | Review imported fields, enter missing data, start new deal, clear fields, Calculate. | Results screen after successful Calculate. | Do not Calculate before required fields and assumptions are reviewed. |
| Results | Calculated output. | Successful Calculate or opening saved results. | Review metrics, charts, schedules, payment analysis, set status, Save Deal, Export PDF. | Save, export, or return to Deal Center. | Do not assume Save Deal uses another credit. |
| Data Safety | Backup and data protection. | Click Data Safety. | Backup Data, review backup location, read restore guidance. | Return to the workflow after backup. | Do not use Data Safety to edit deals or run calculations. |
6. Credits and License Activation
Screenshot: Credits screen
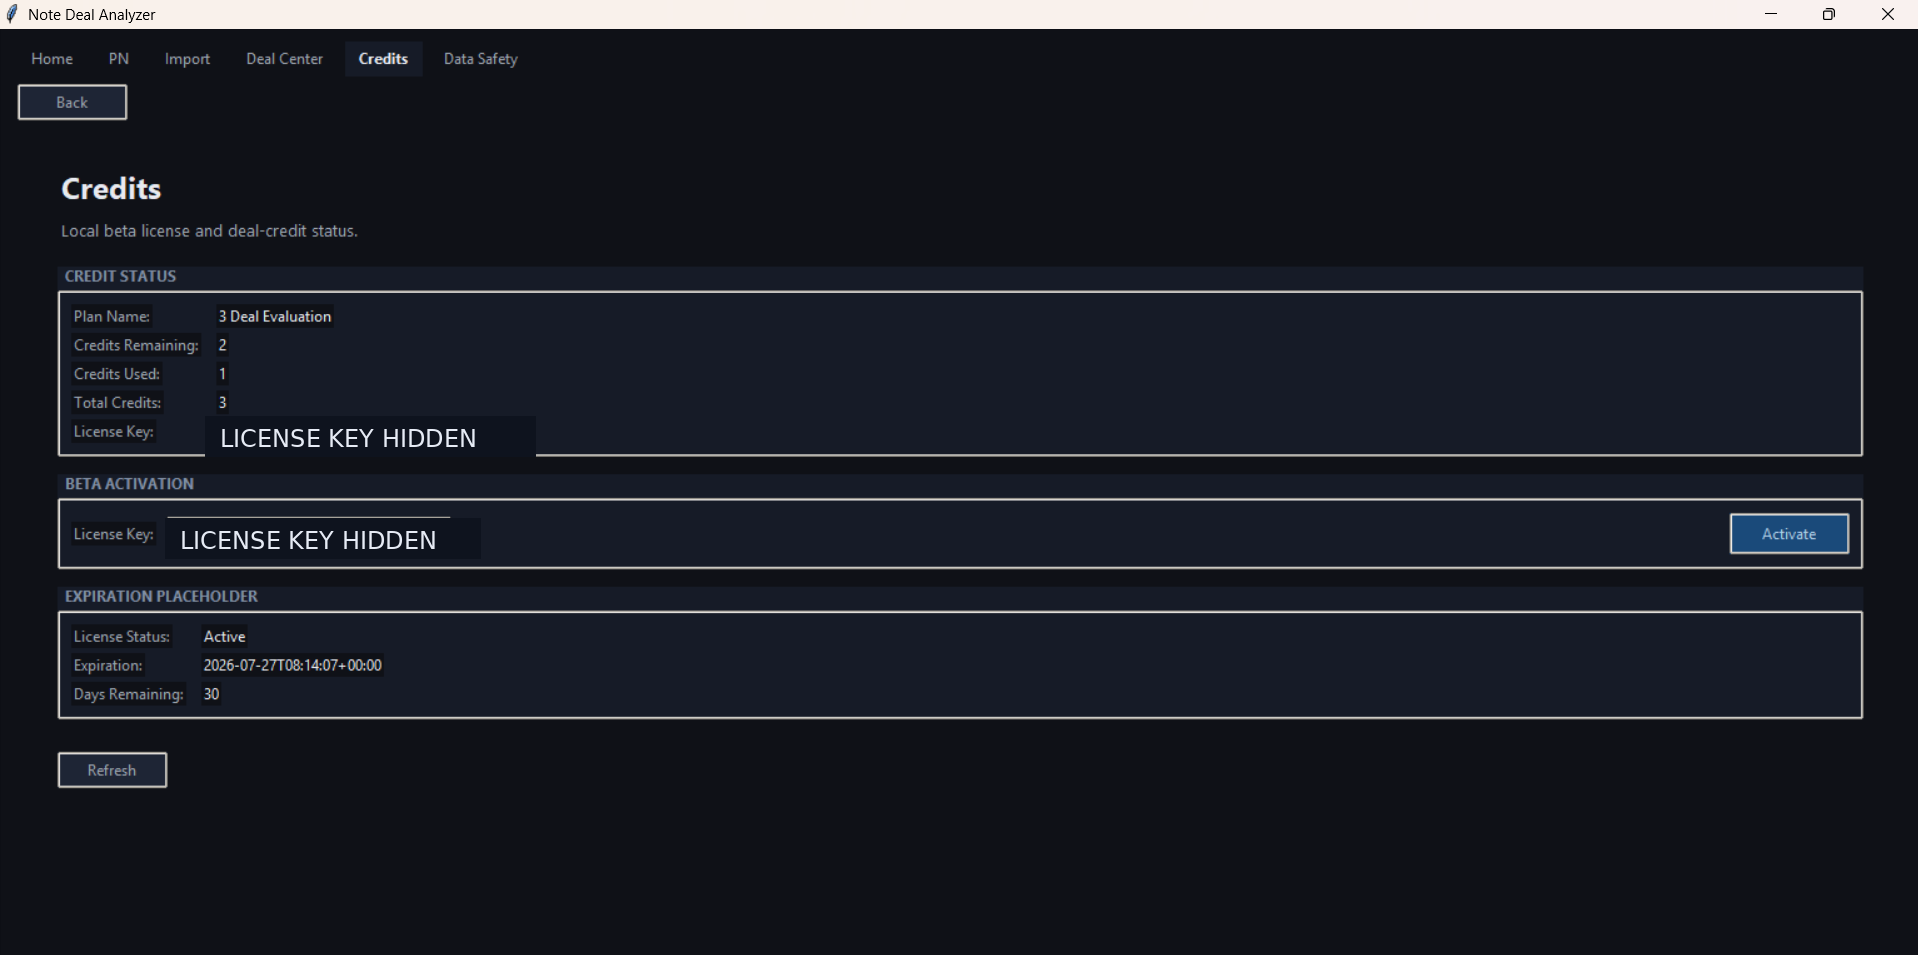
Windows and macOS use the same Credits screen for credit balance, but they buy credits differently.
Windows: Purchase credits on the website. Lemon Squeezy emails a license key. Enter that key on Credits, then click Activate.
macOS: Purchase credit packs inside NoteDealAnalyzer using Apple In-App Purchase. Open Credits, choose 1, 3, 5, or 10 credits, and complete the purchase through Apple. Do not use the website checkout and do not enter a website license key on Mac.
Windows license-key steps:
- Open Credits.
- Enter your License Key.
- Click Activate.
- Click Refresh to confirm the latest balance.
macOS in-app purchase steps:
- Open Credits.
- Choose the 1, 3, 5, or 10 credit pack.
- Complete the purchase through Apple.
- Confirm the latest balance.
| Field | Meaning |
|---|---|
| Plan Name | The active license or credit package. |
| Credits Remaining | Credits still available for successful calculations. |
| Credits Used | Credits already used by successful calculation. |
| Total Credits | Total credits included in the active package. |
| License Key | The key stored in the app. Do not share it publicly. |
| License Status | Whether the license is active, expired, or not activated. |
| Expiration / Days Remaining | If visible, shows when access expires and how many days remain. |
| What uses credits and what does not Activate: no credit. Refresh: no credit. Import: no credit. Open deal or saved results: no credit. Successful Calculate: 1 credit. Save Deal: no credit. Export PDF Report: no credit. |
|---|
7. Import Workflow
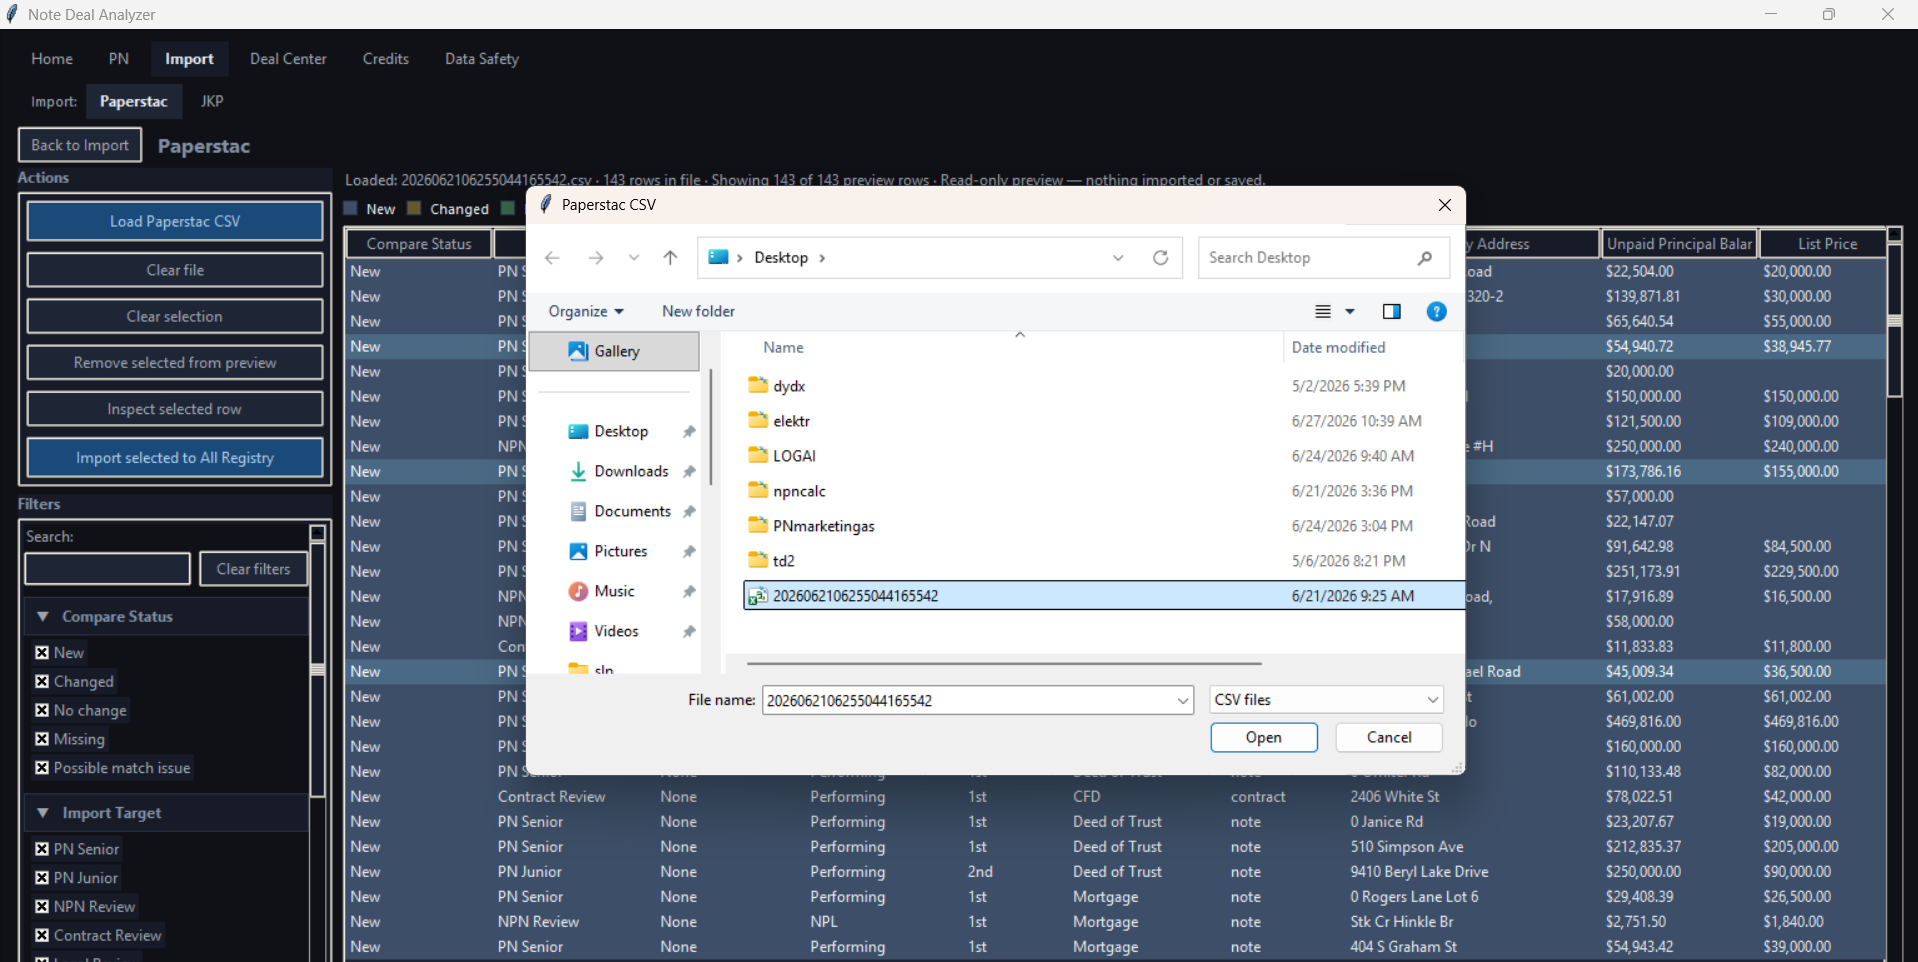
Screenshot: Import screen - loading a Paperstac CSV
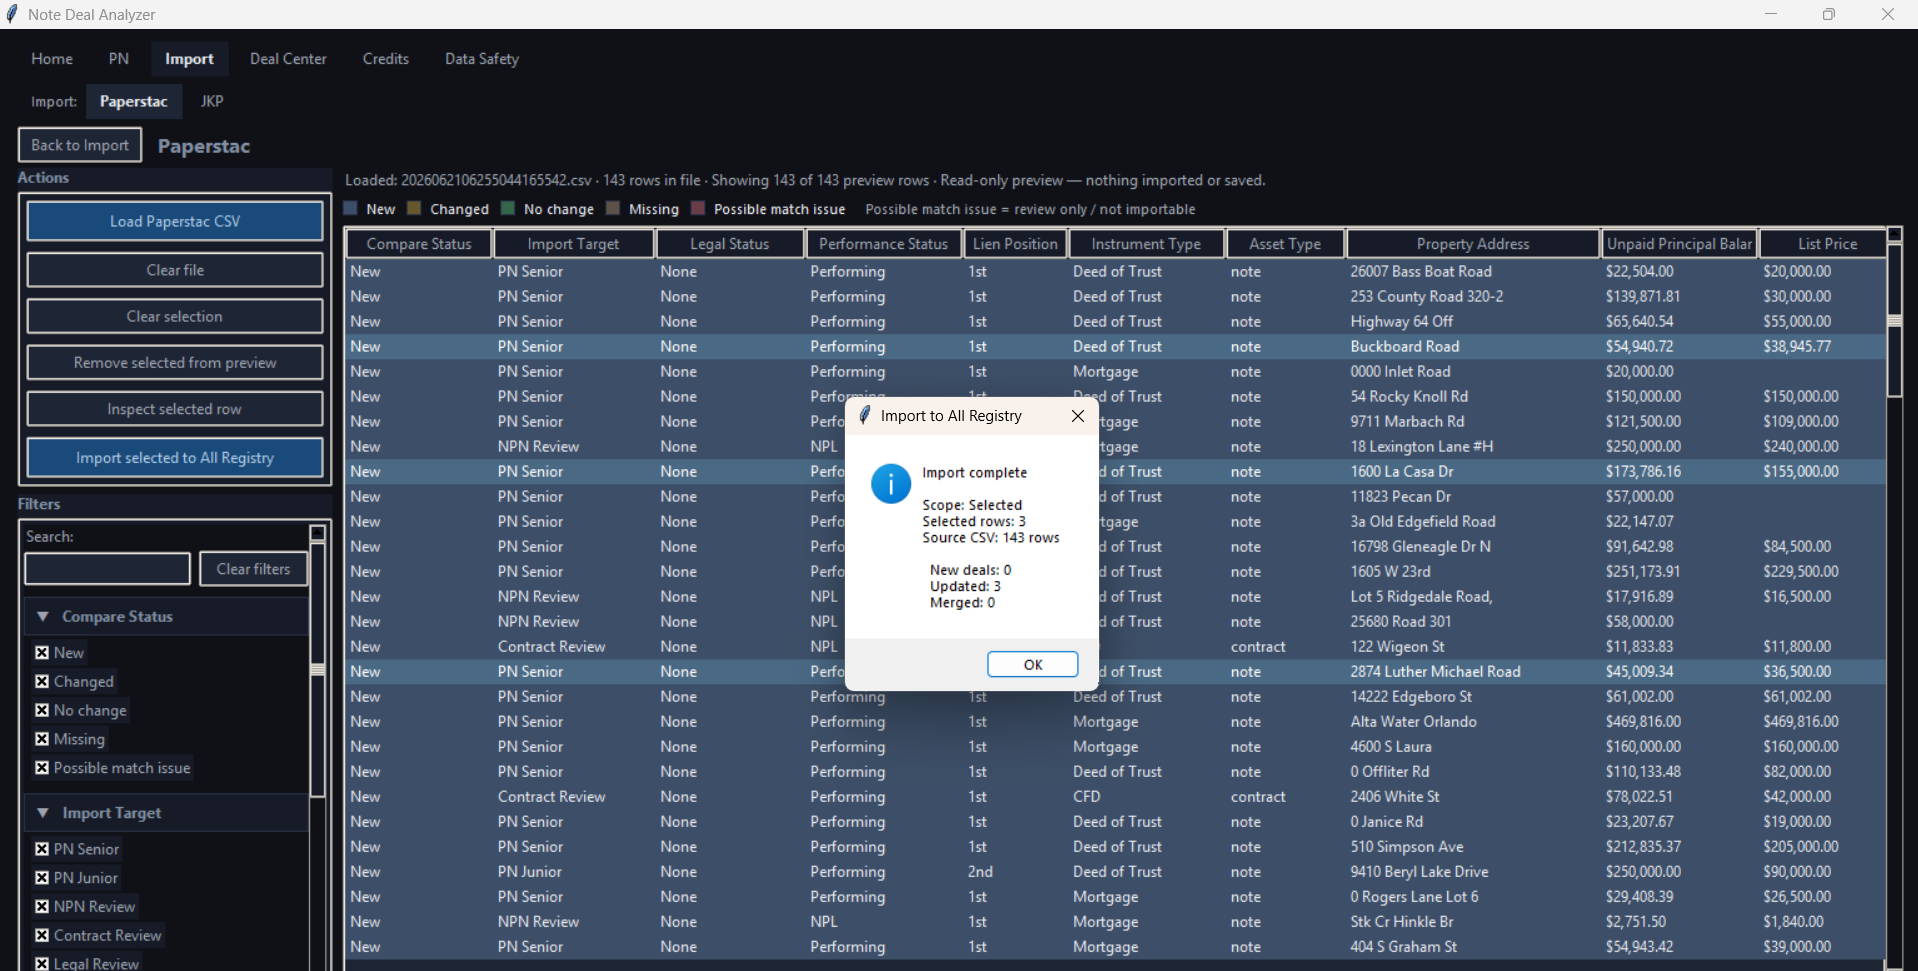
Screenshot: Import screen - selected rows imported to All Registry
- Click Import.
- Choose Paperstac or JKP where visible.
- Click Load Paperstac CSV or Load JKP workbook/CSV.
- Review the preview table.
- Use filters/search where visible.
- Select visible rows or manually select rows.
- Inspect selected row if needed.
- Remove selected from preview if needed.
- Click Import selected to All Registry.
- Go to Deal Center.
- Import does not use credits.
- Imported deals still need PN review and Calculate before results exist.
- Review-only rows may remain outside PN1/PN2 queues.
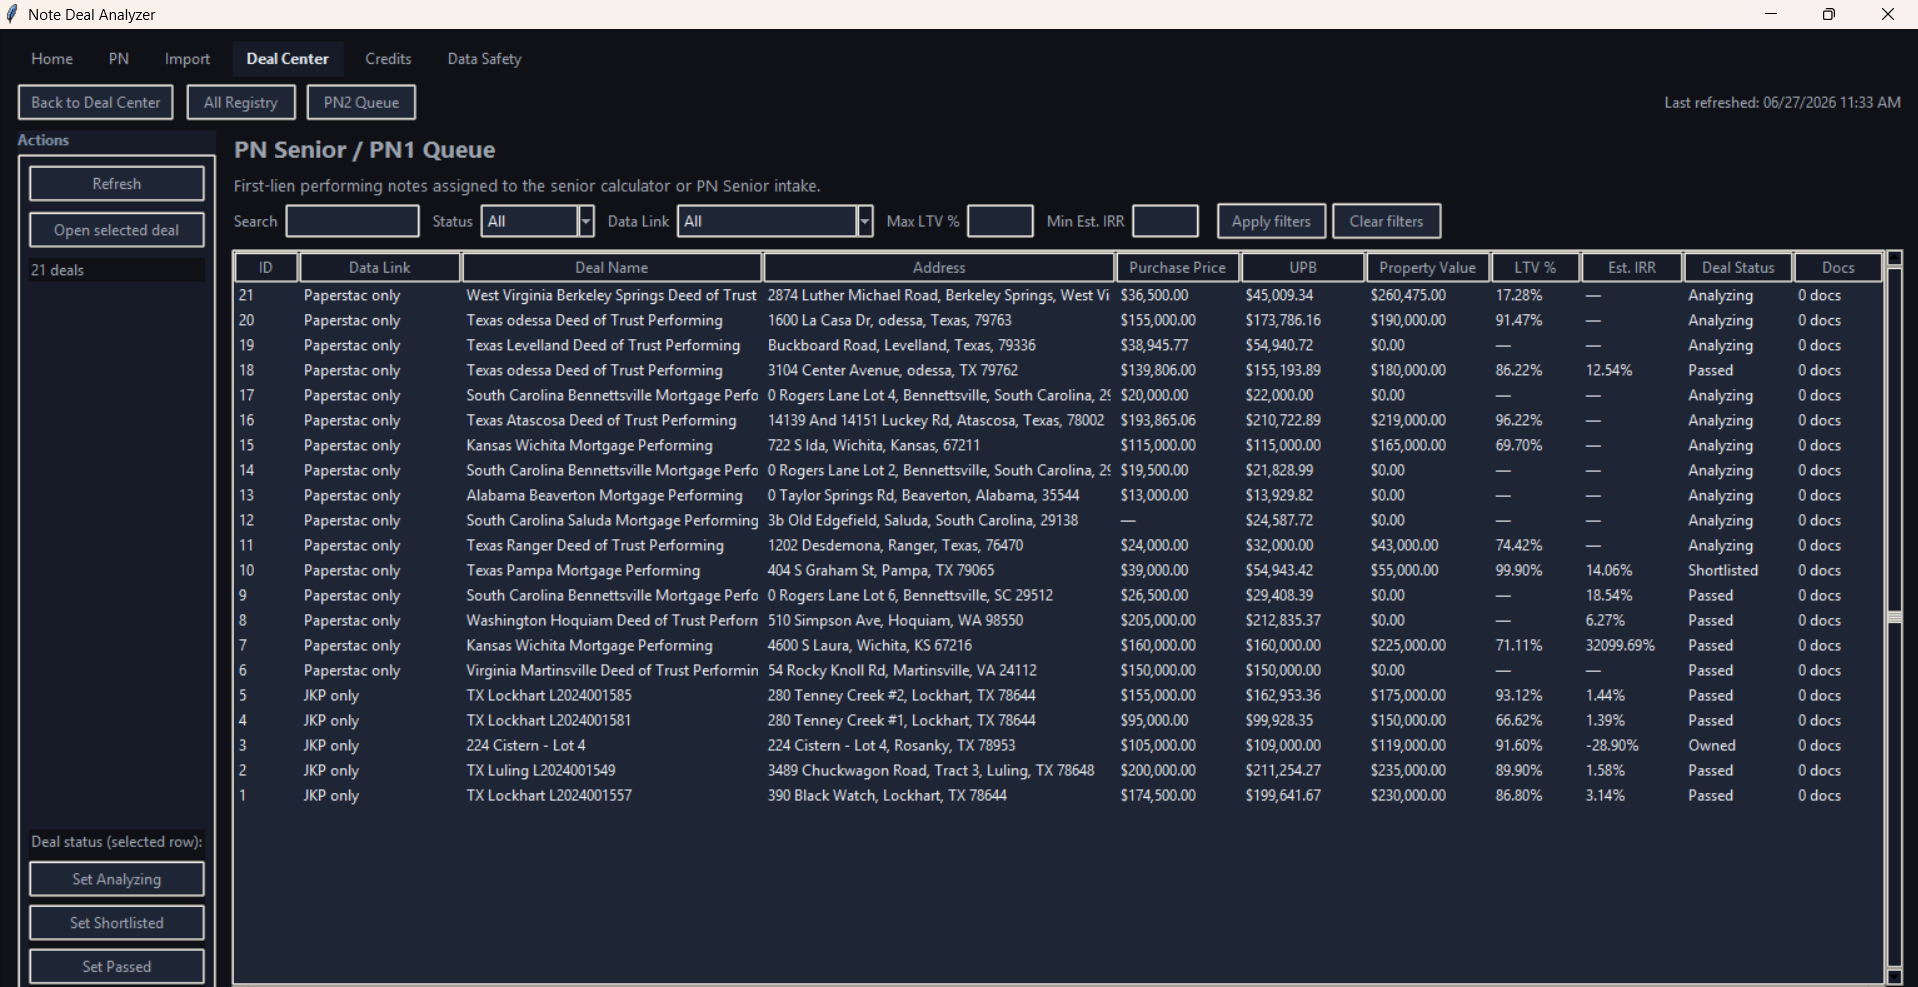
8. Deal Center Workflow
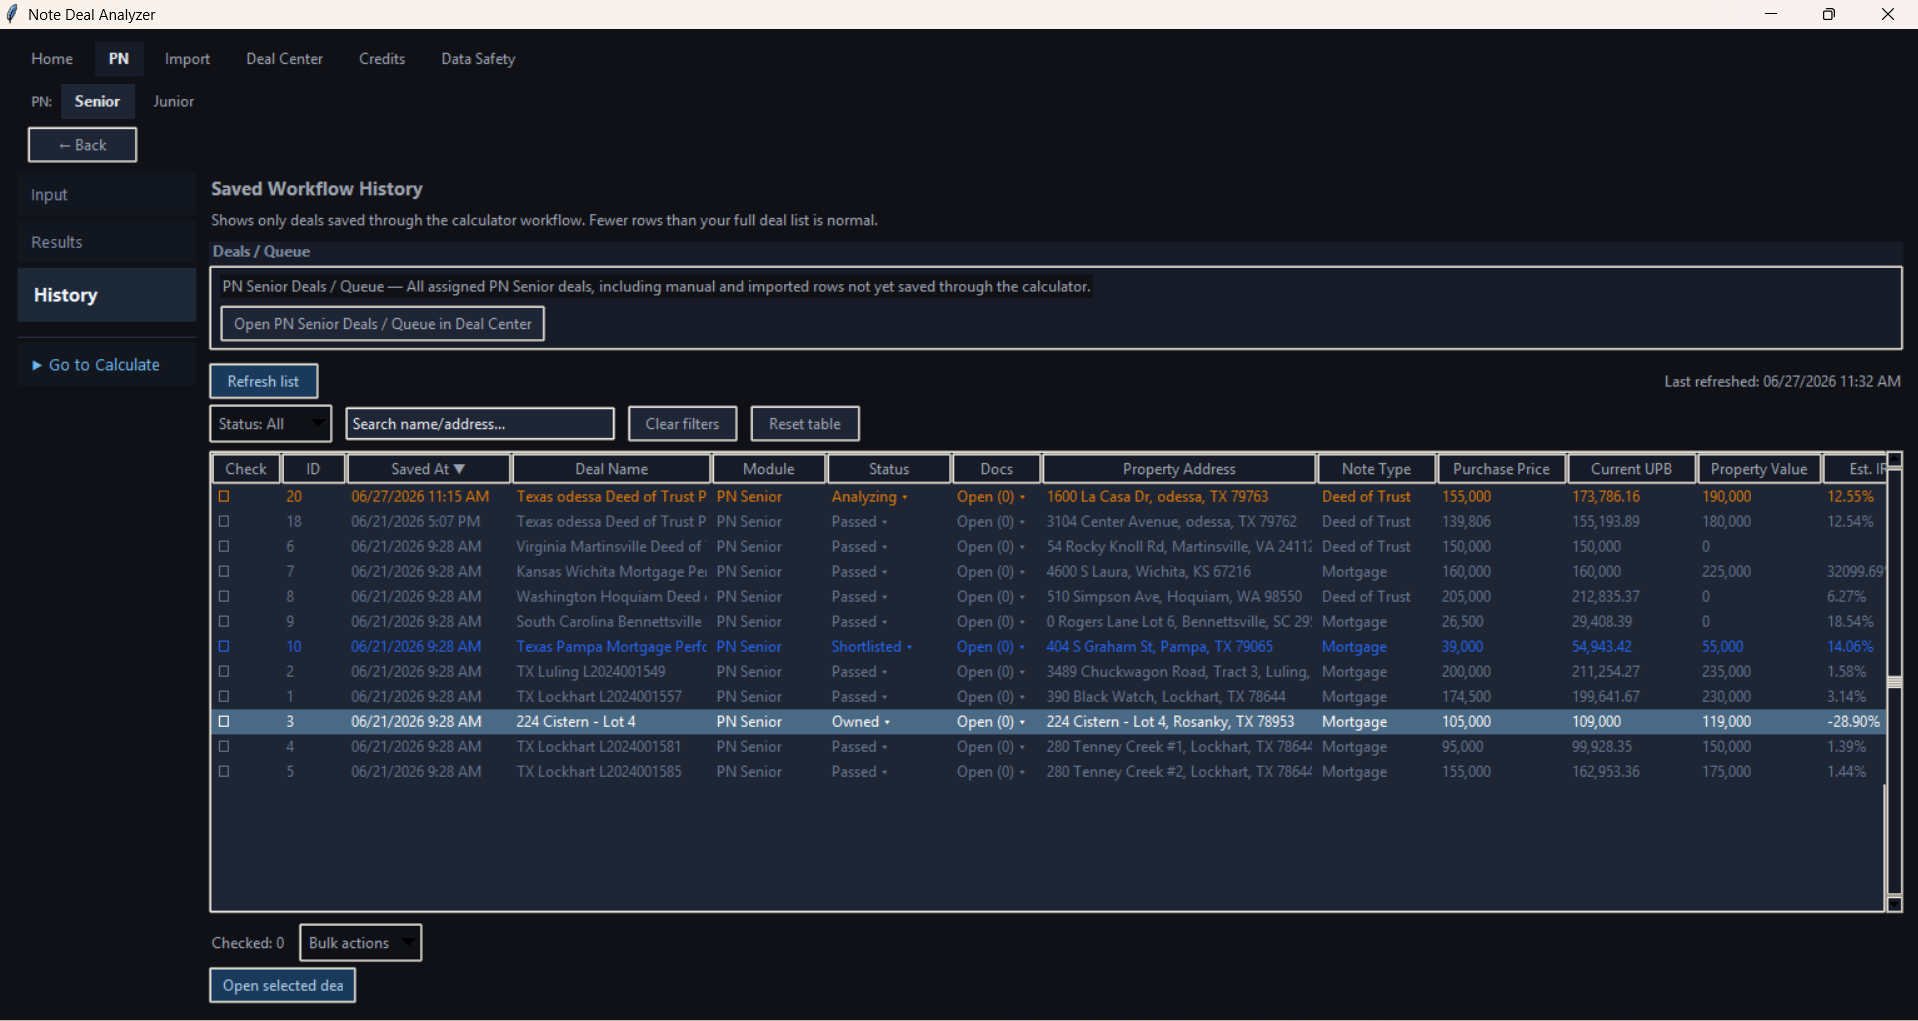
Screenshot: Deal Center / PN Senior Queue
- Open Deal Center.
- Choose All Registry, PN1 Queue, or PN2 Queue.
- Click Refresh if needed.
- Select a row.
- Click Open selected deal.
- Continue in PN Input or Results.
9. Deal Analysis / PN Workflow
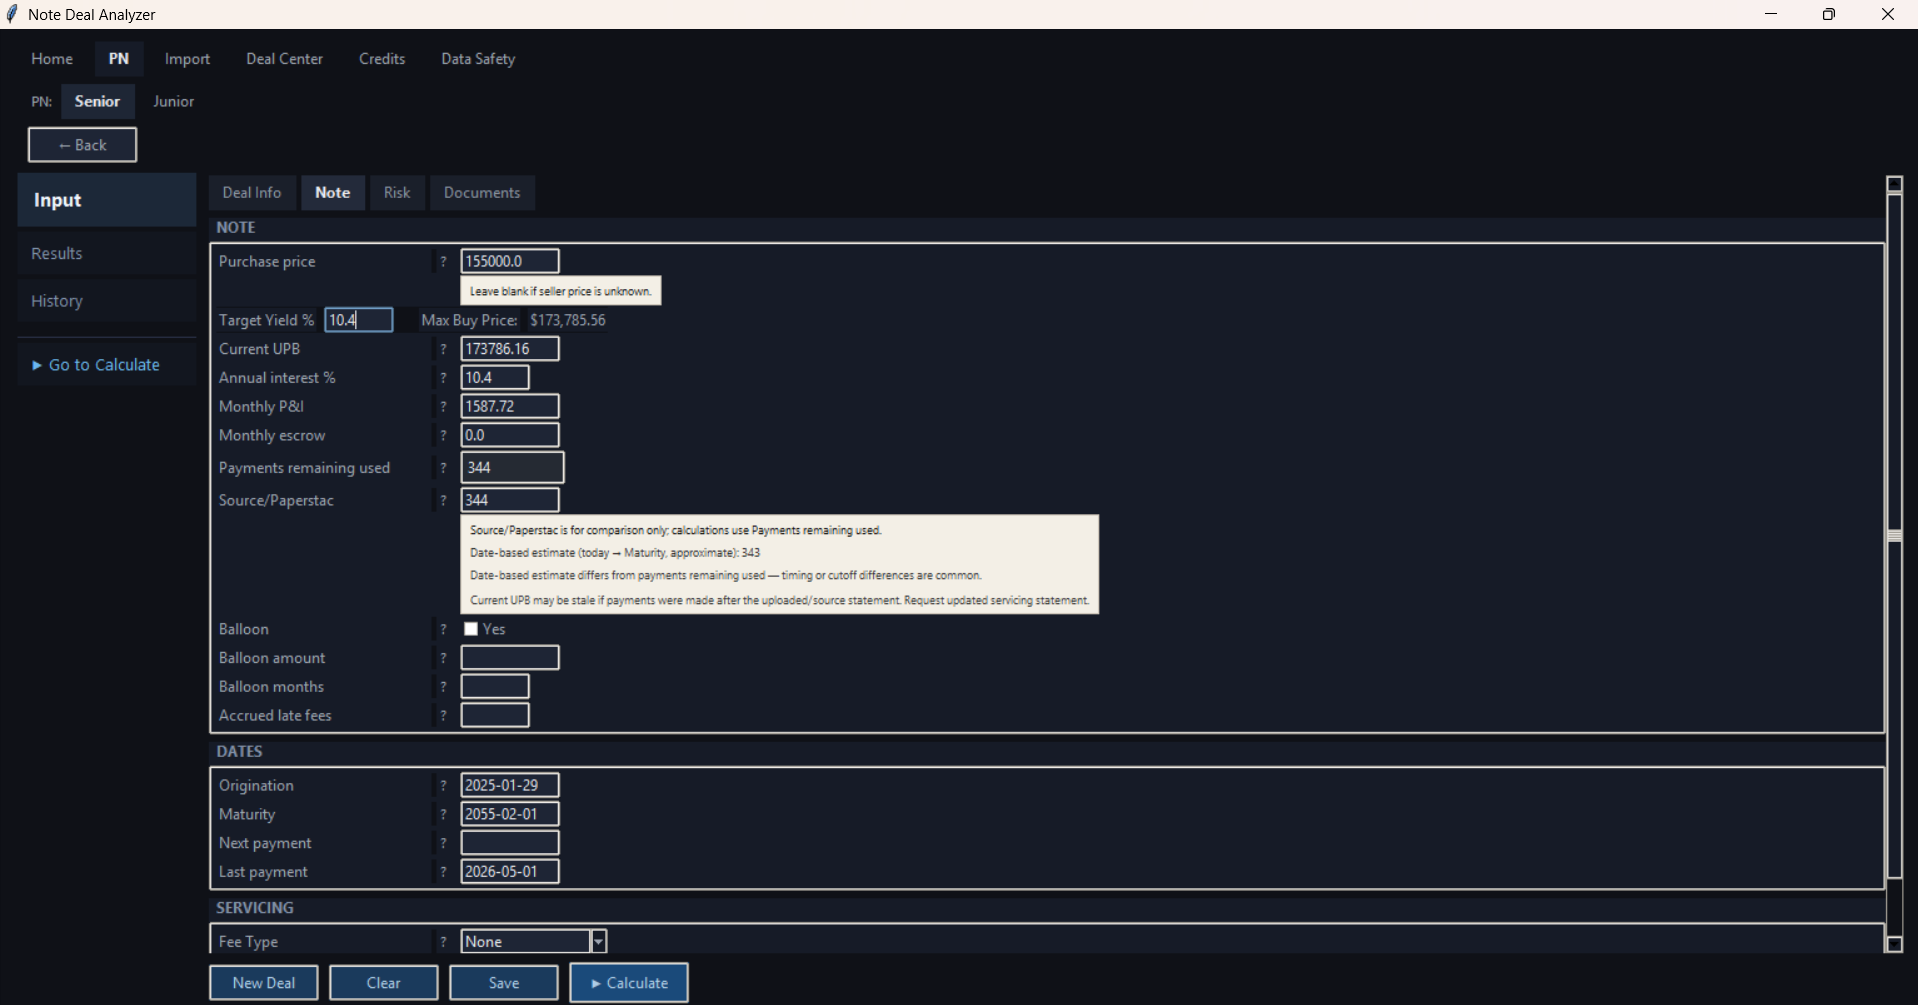
Screenshot: PN Input - Note tab
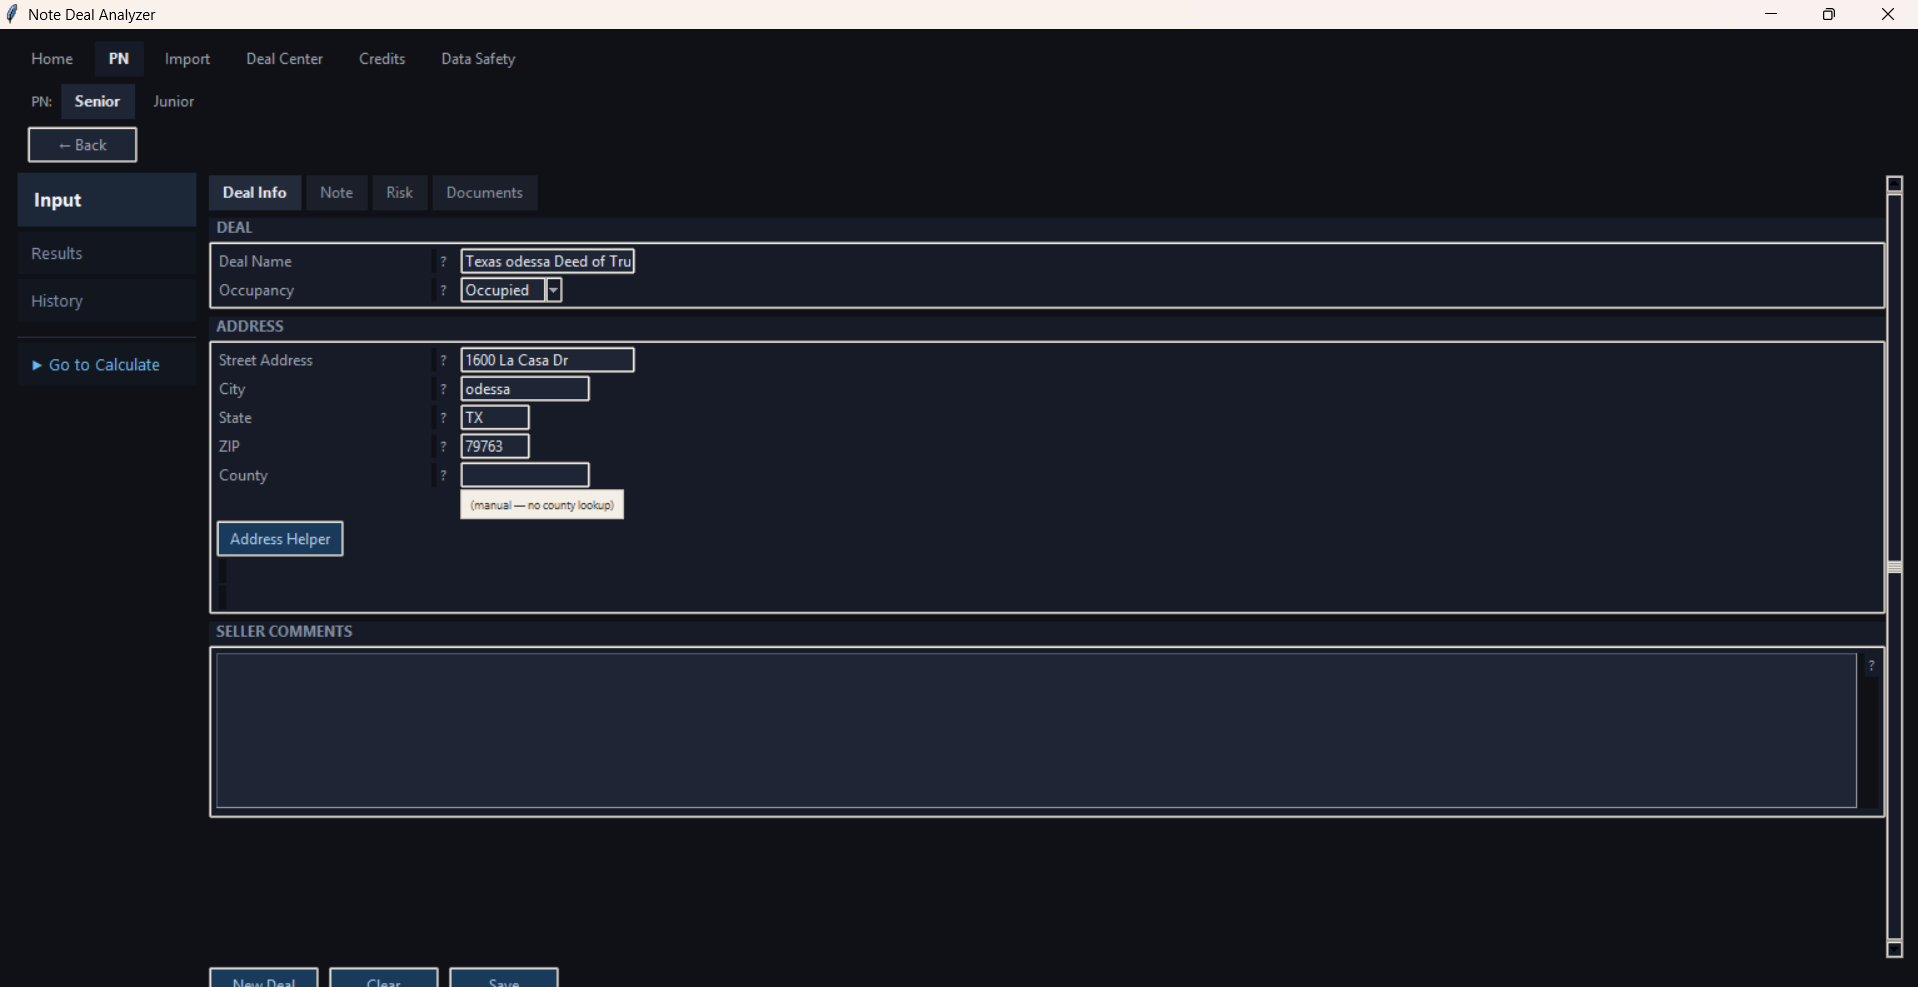
Screenshot: PN Input - Risk / supporting fields
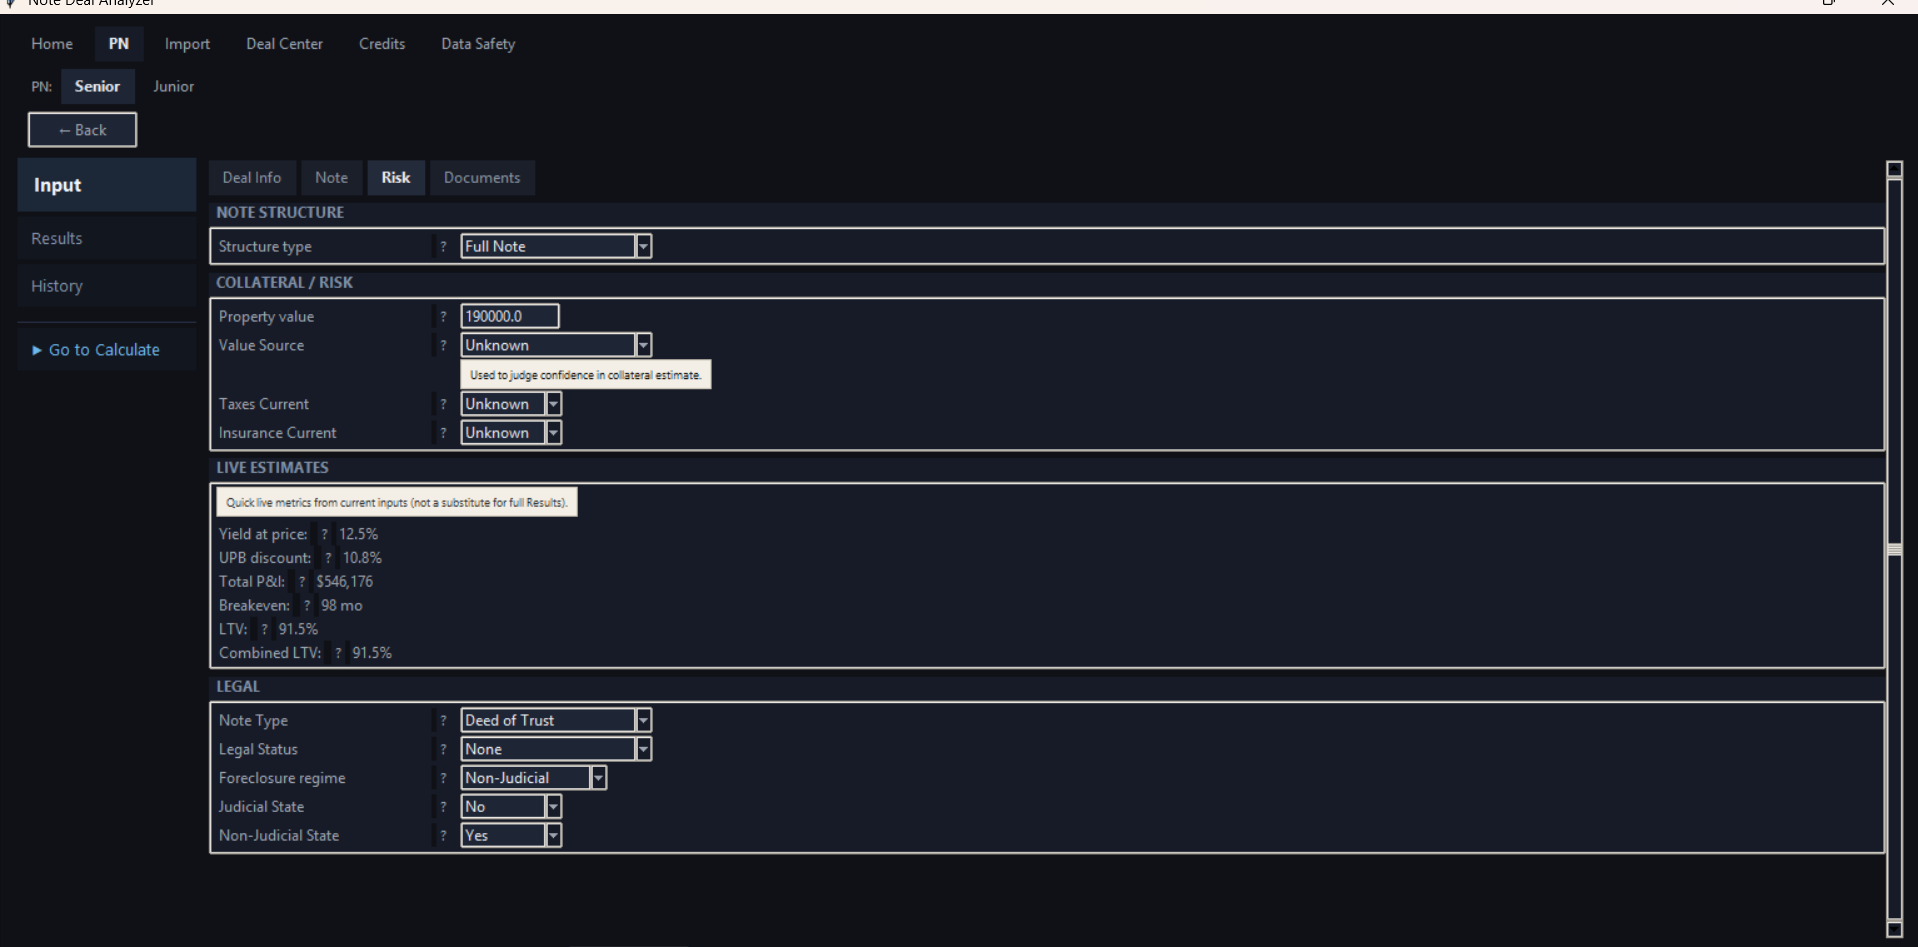
Screenshot: PN Input - additional Note fields
| Before pressing Calculate License is active. Credits Remaining is greater than 0. Correct deal is open. Required fields are reviewed. Assumptions are checked. You understand that successful Calculate uses 1 credit. |
|---|
- Open the deal in PN Input.
- Review fields.
- Complete required missing information.
- Click Calculate.
- If validation fails, correct the issue and try again.
- If calculation succeeds, Results opens and 1 credit is used.
For PN Junior, use Run preliminary analysis only when the app offers that option and senior lien information is not available.
Back to top10. Results, Save Deal, and PDF Export
Screenshot: Results - overview and scenario decision
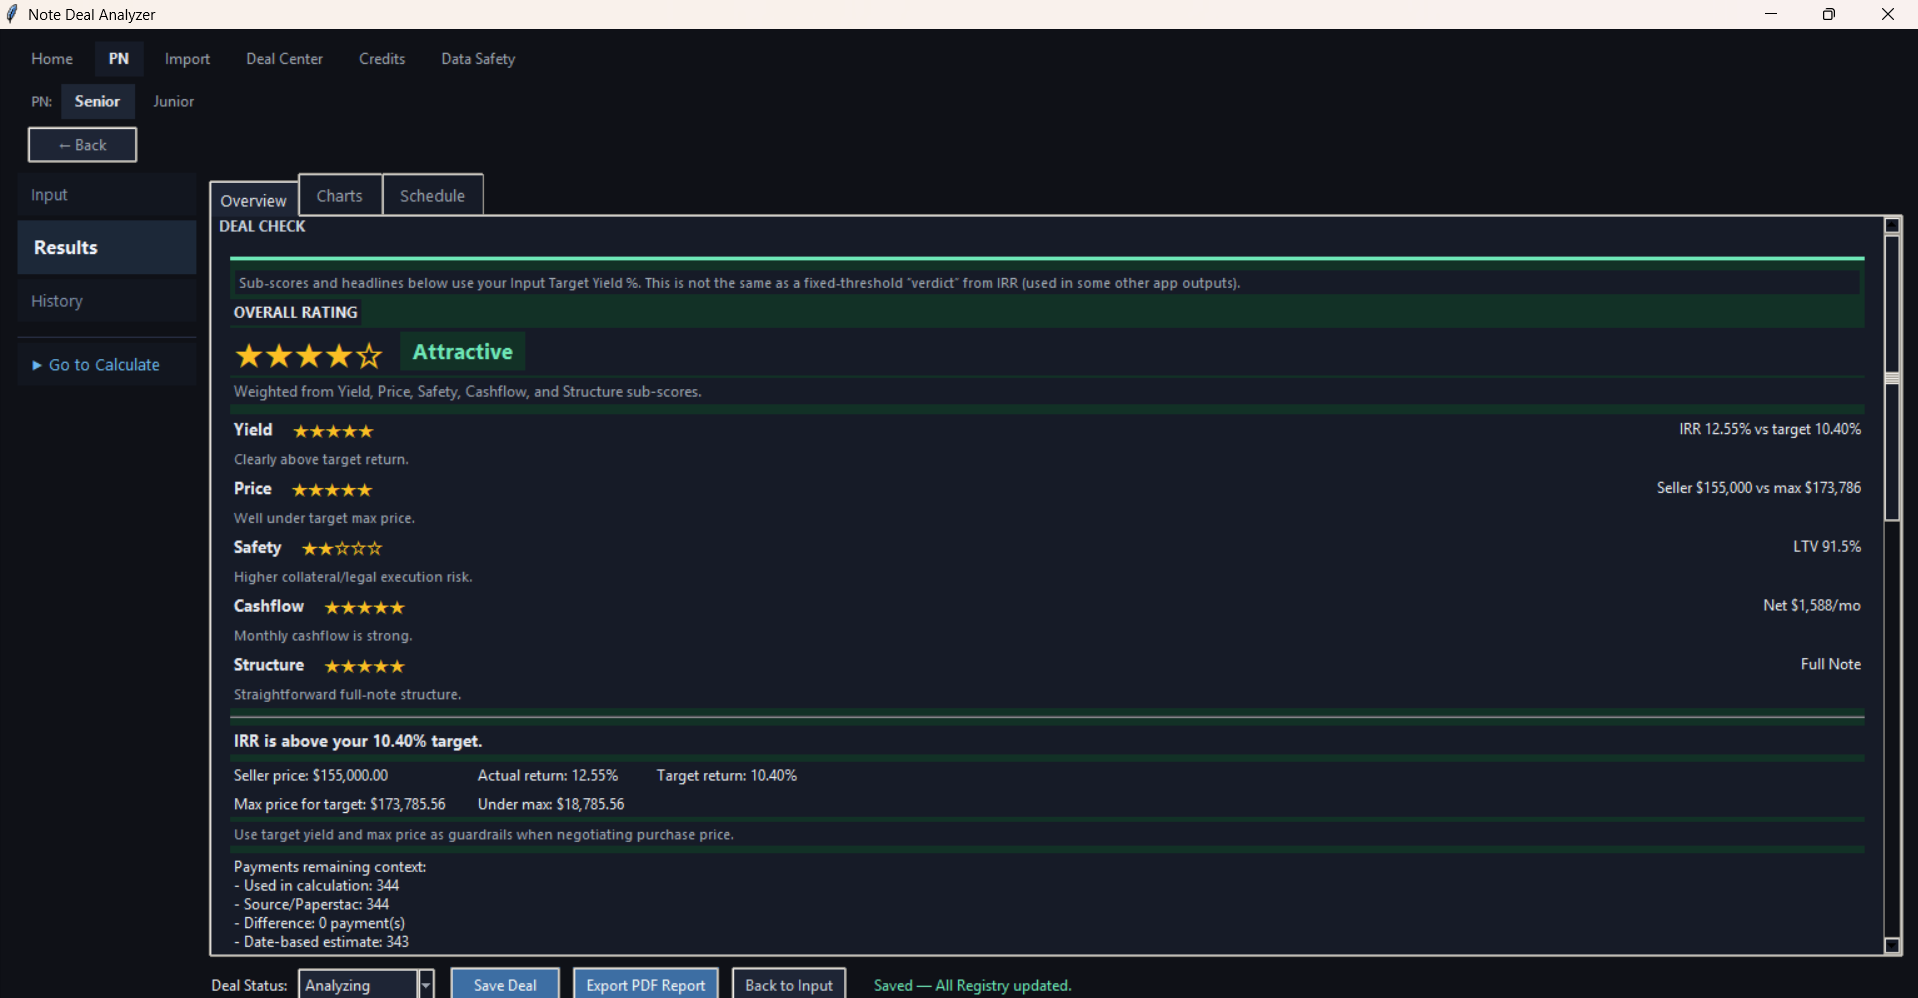
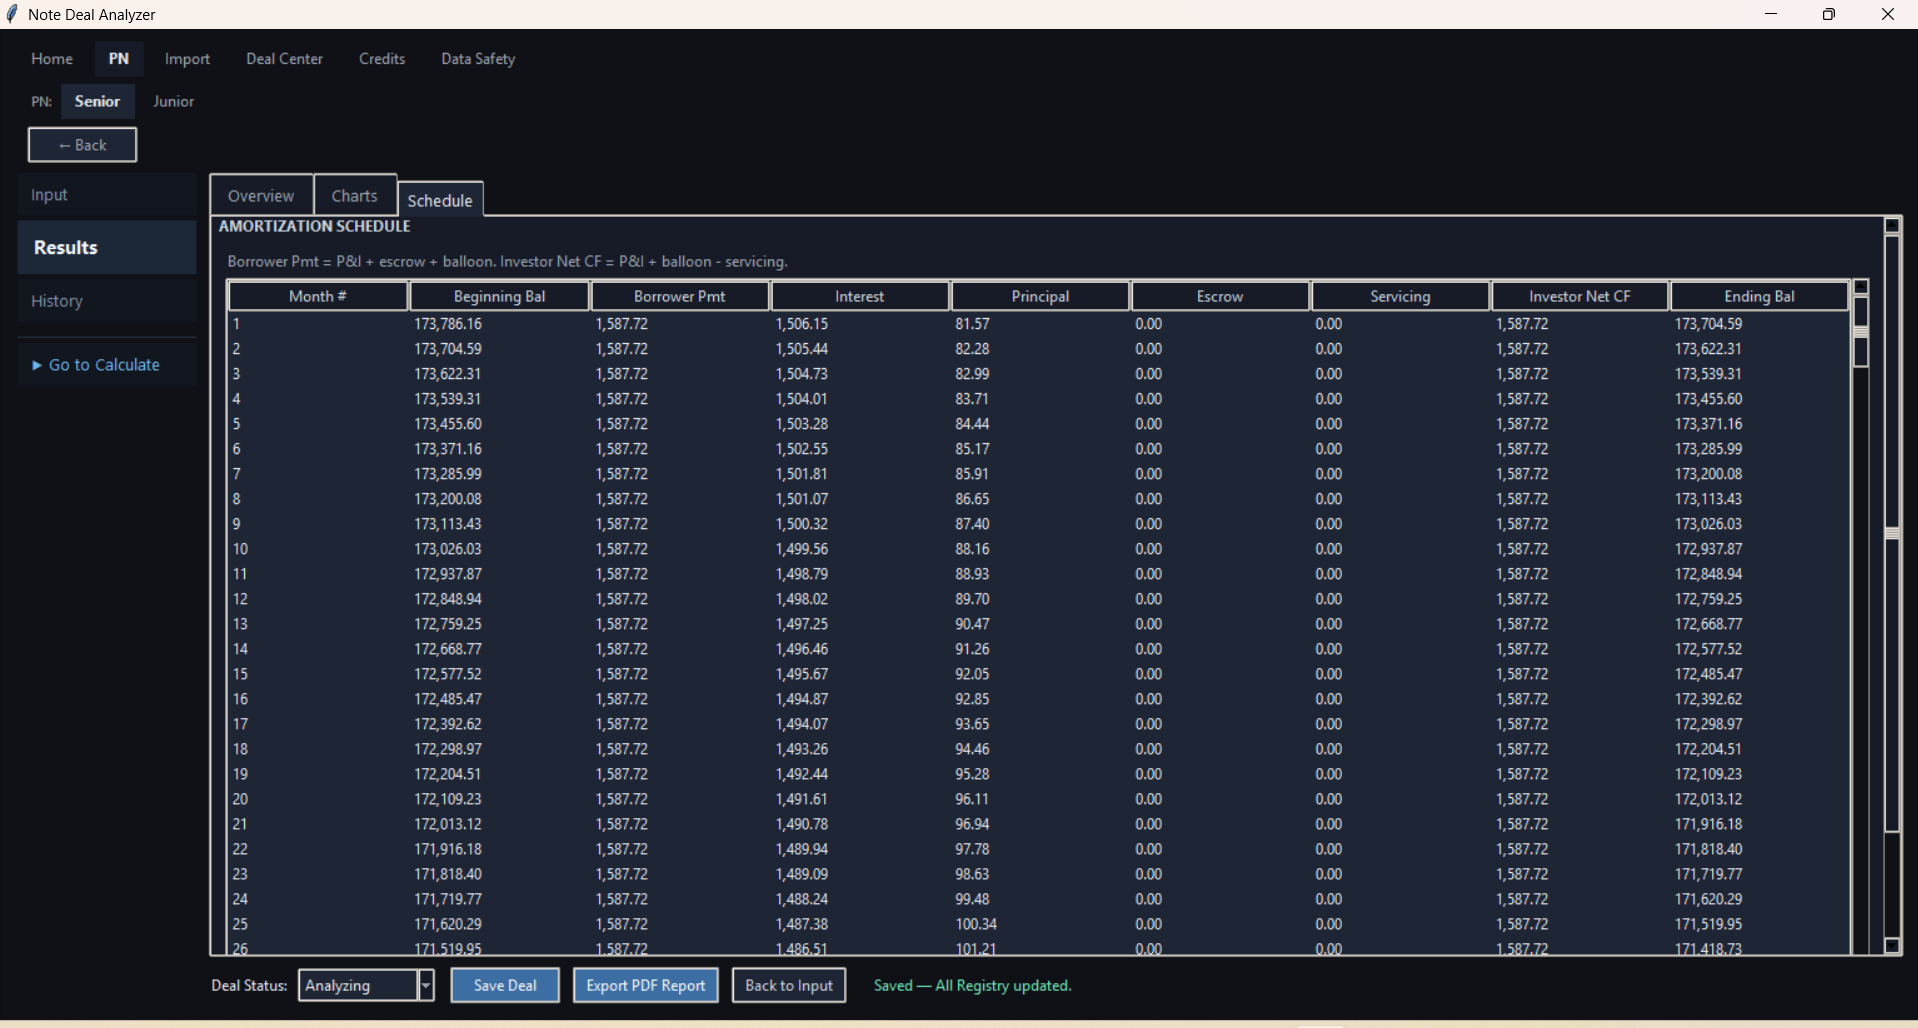
Screenshot: Results - summary and schedule tabs
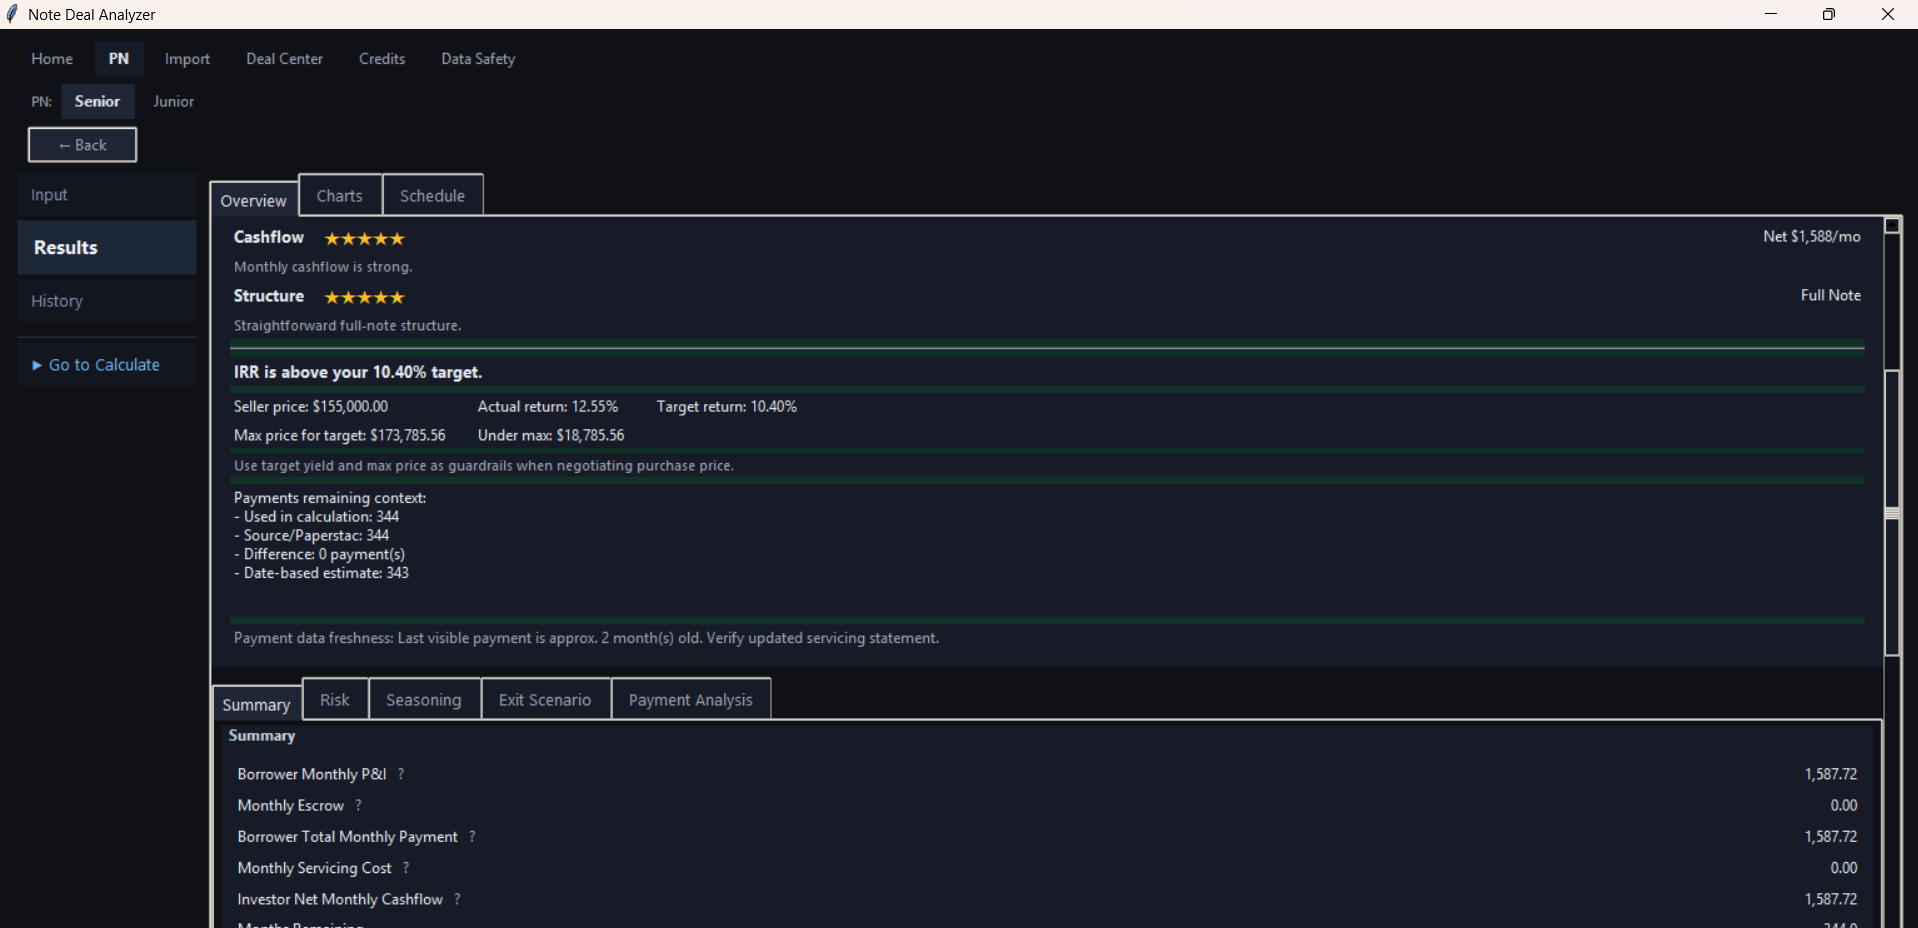
Screenshot: Results - schedule/details view
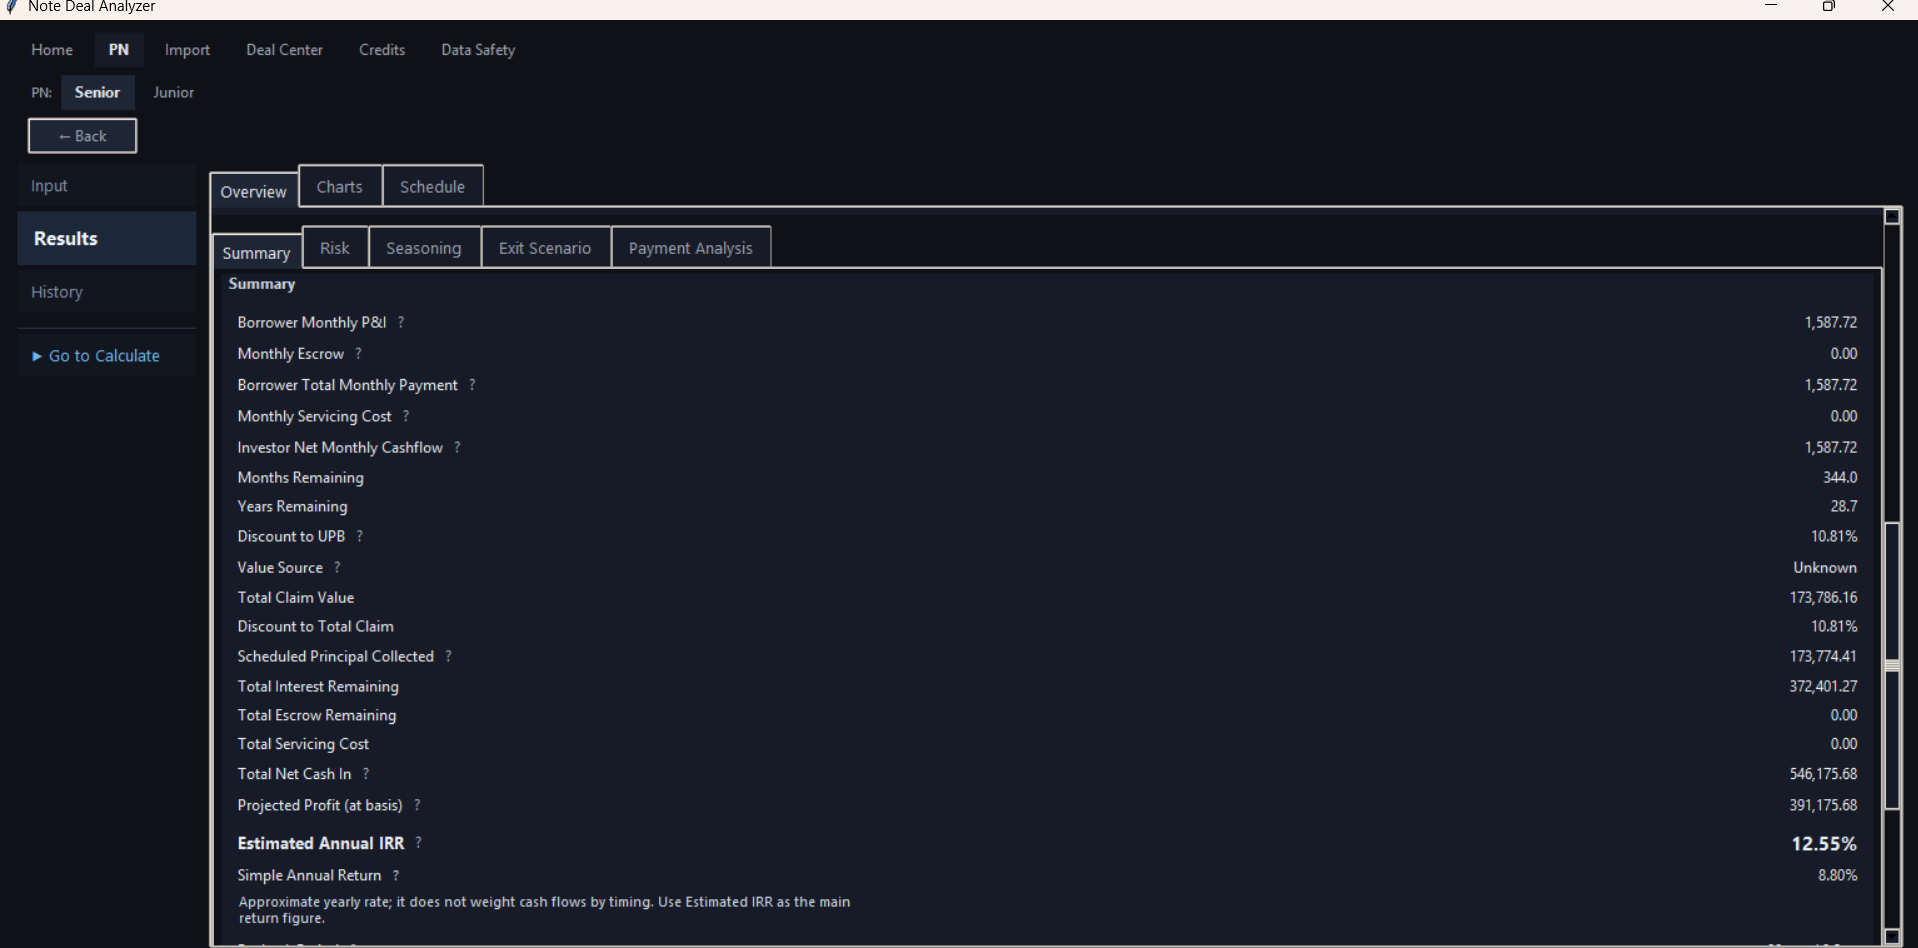
Screenshot: Results - scenario comparison
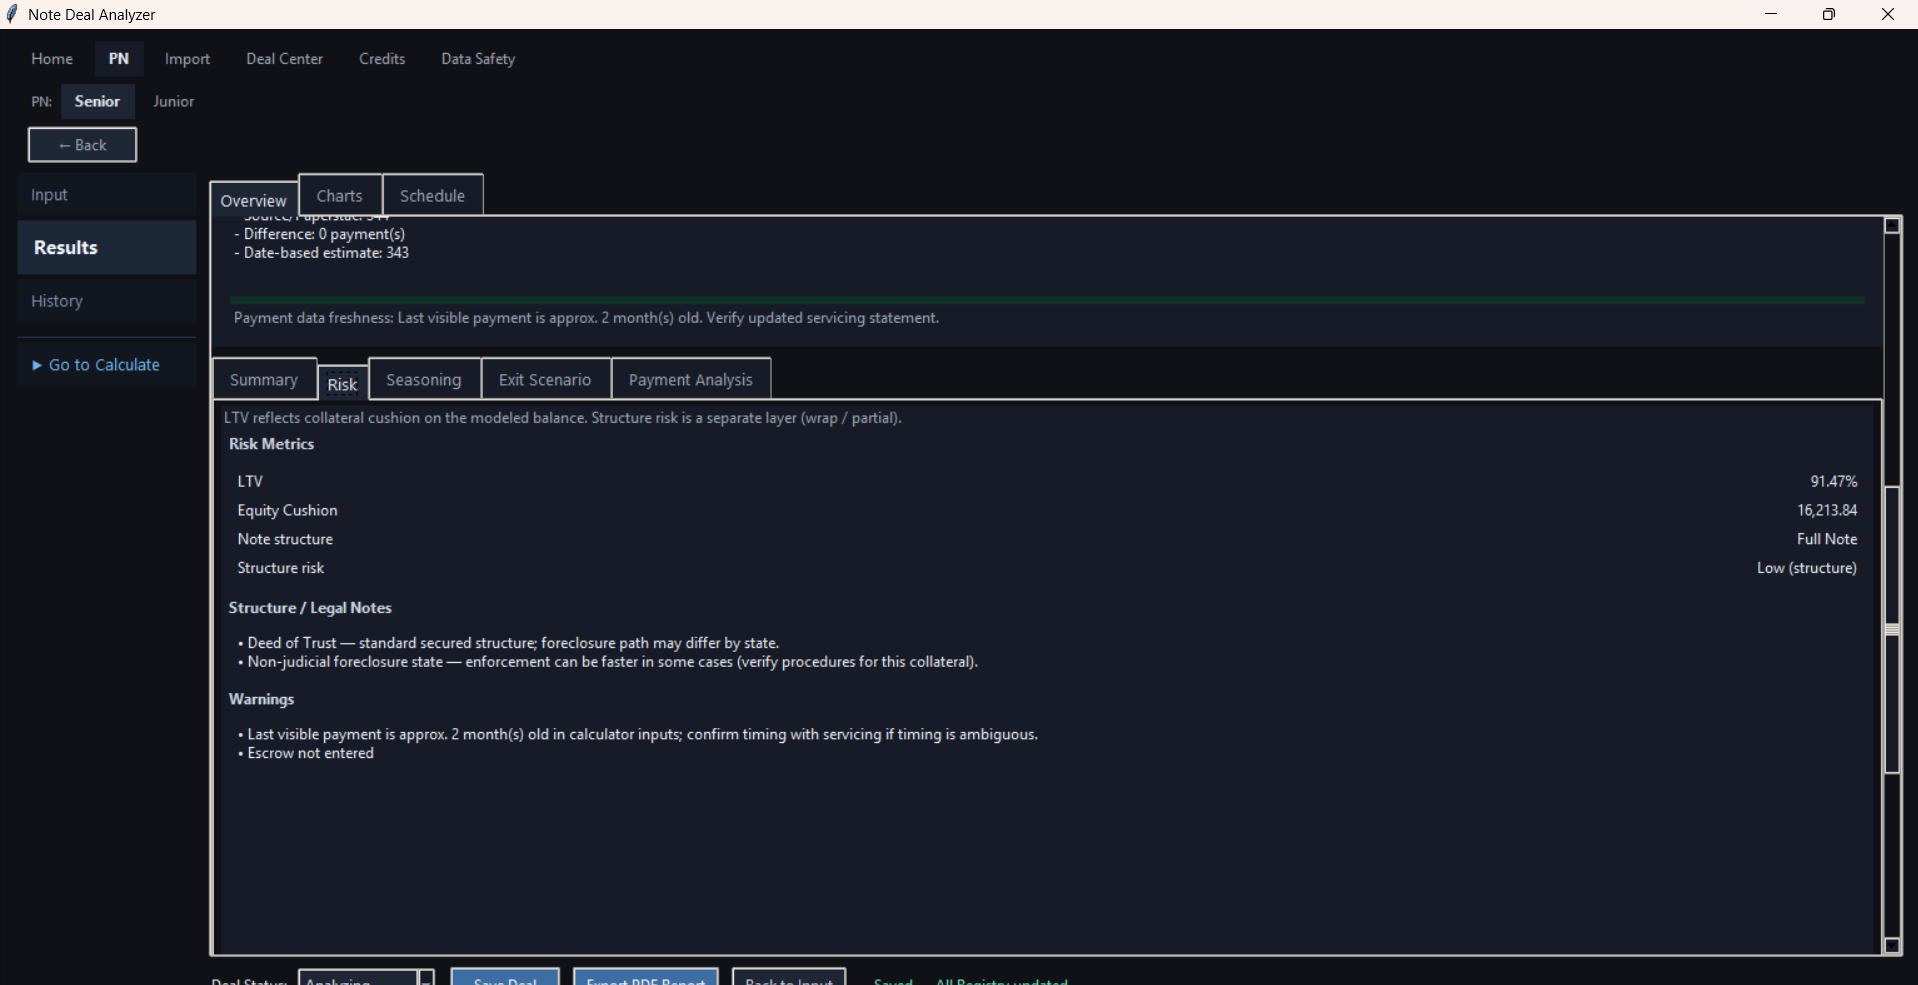
Screenshot: Results - exit scenario editor
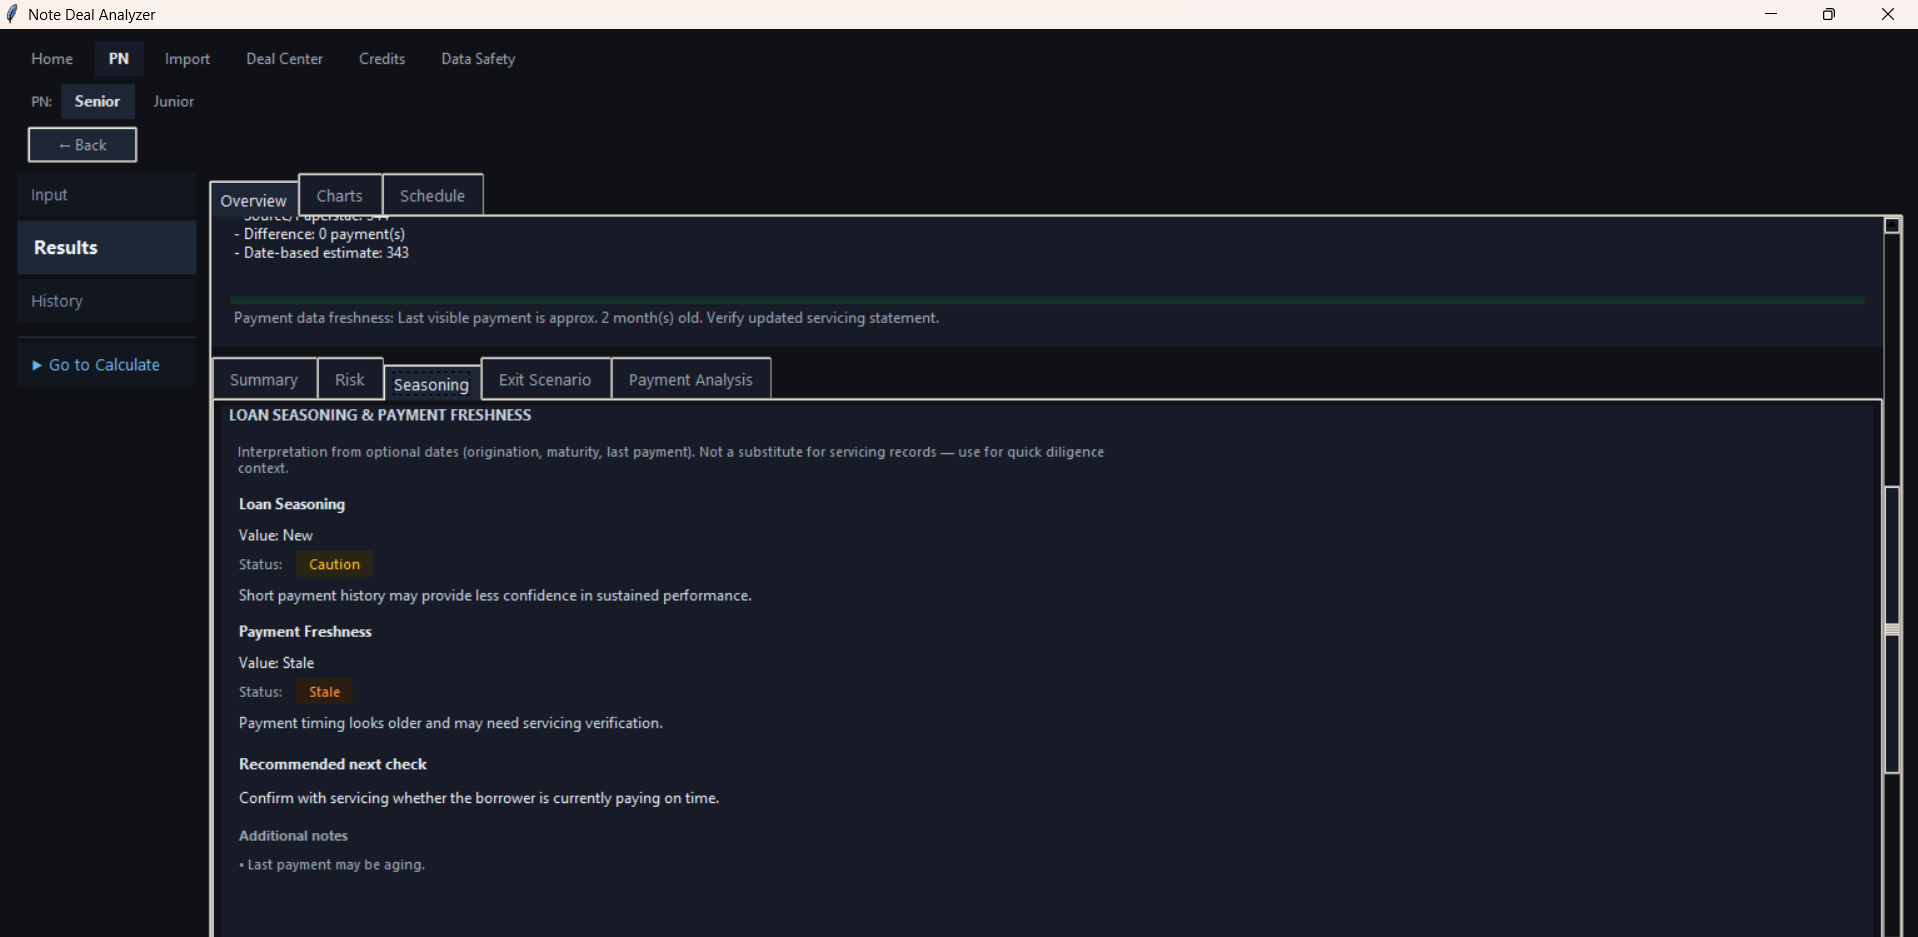
Screenshot: Results - payment analysis / scenario options
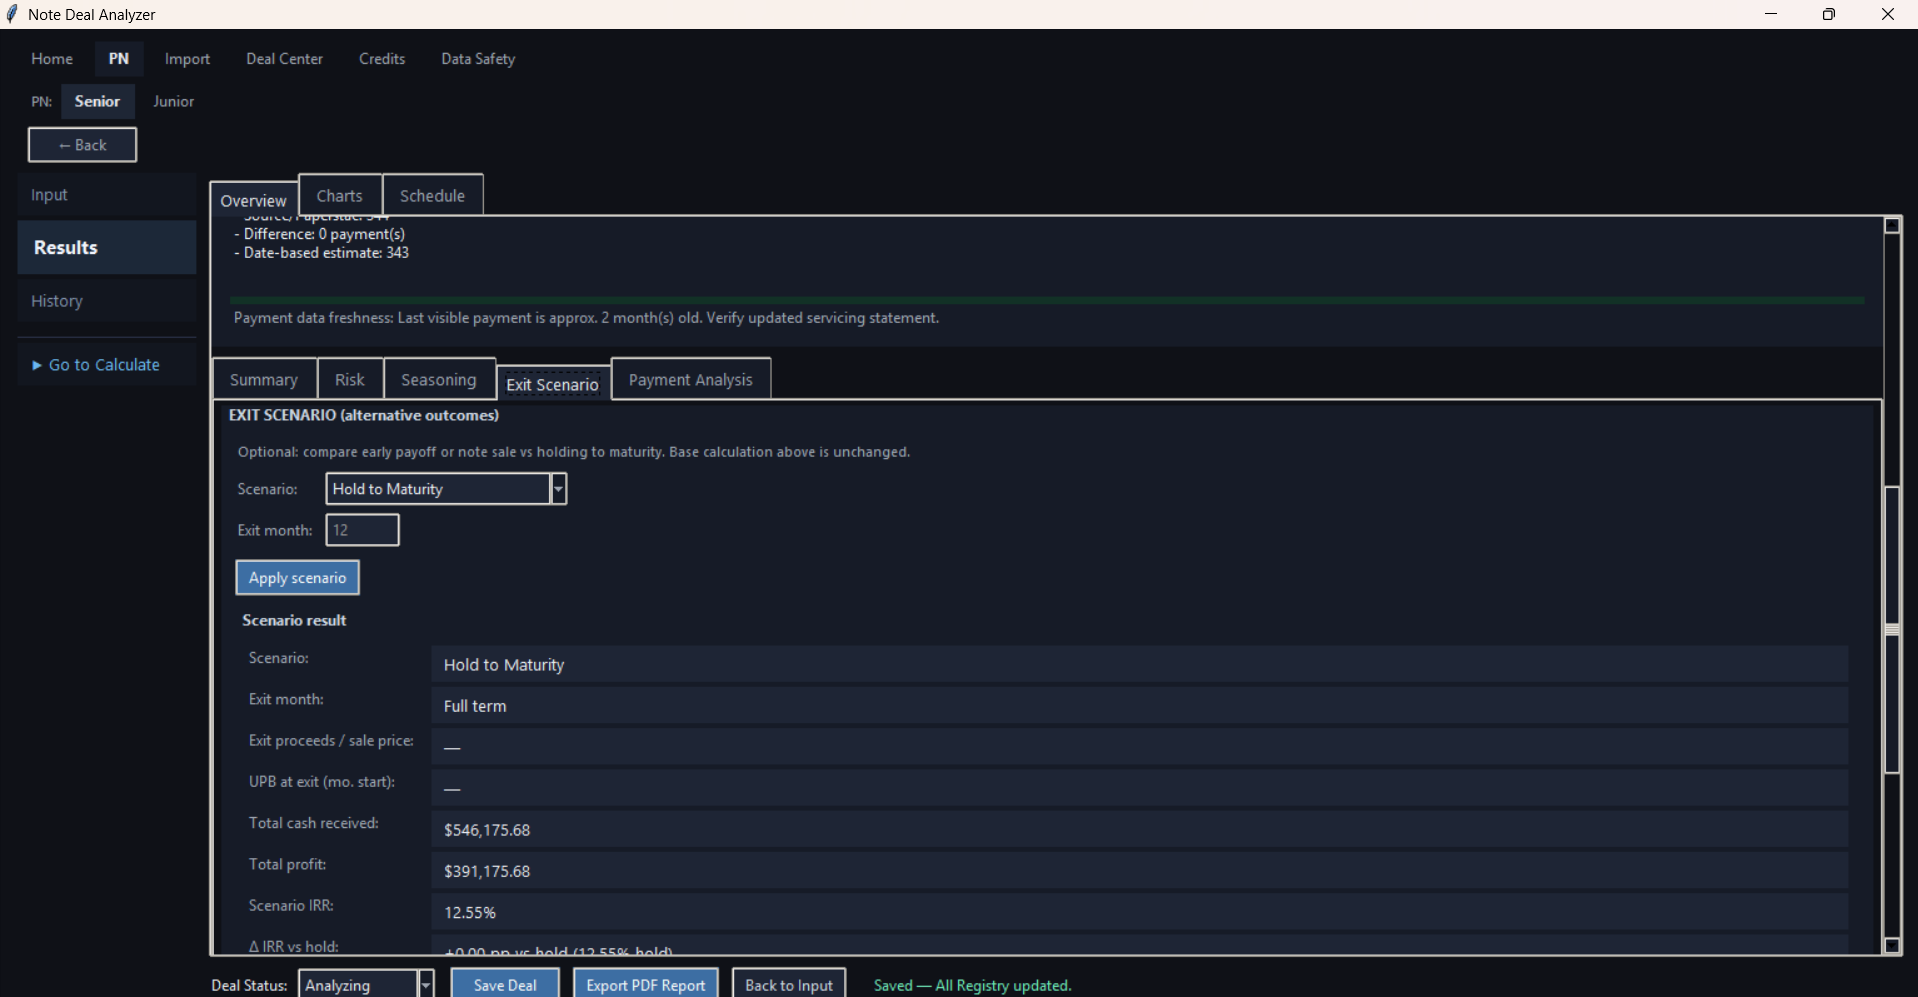
Screenshot: Results - chart view
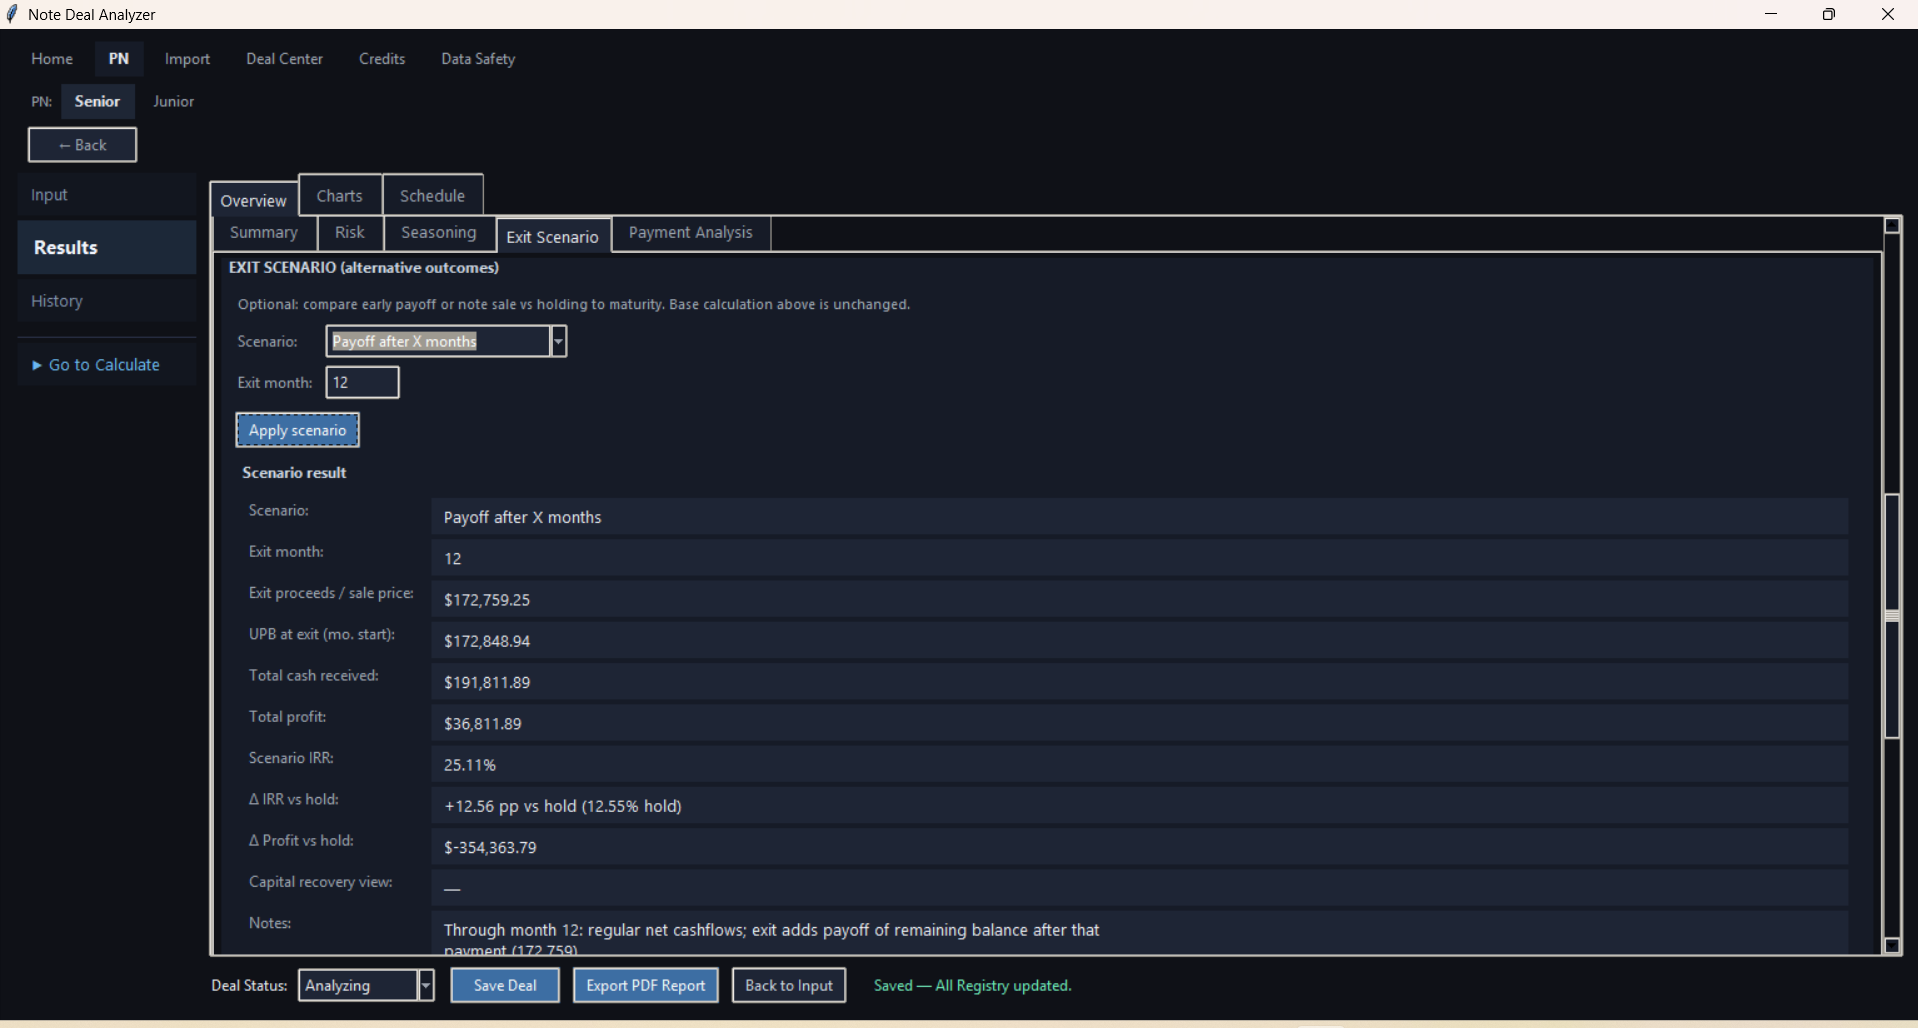
Screenshot: Results - reasoning and result notes
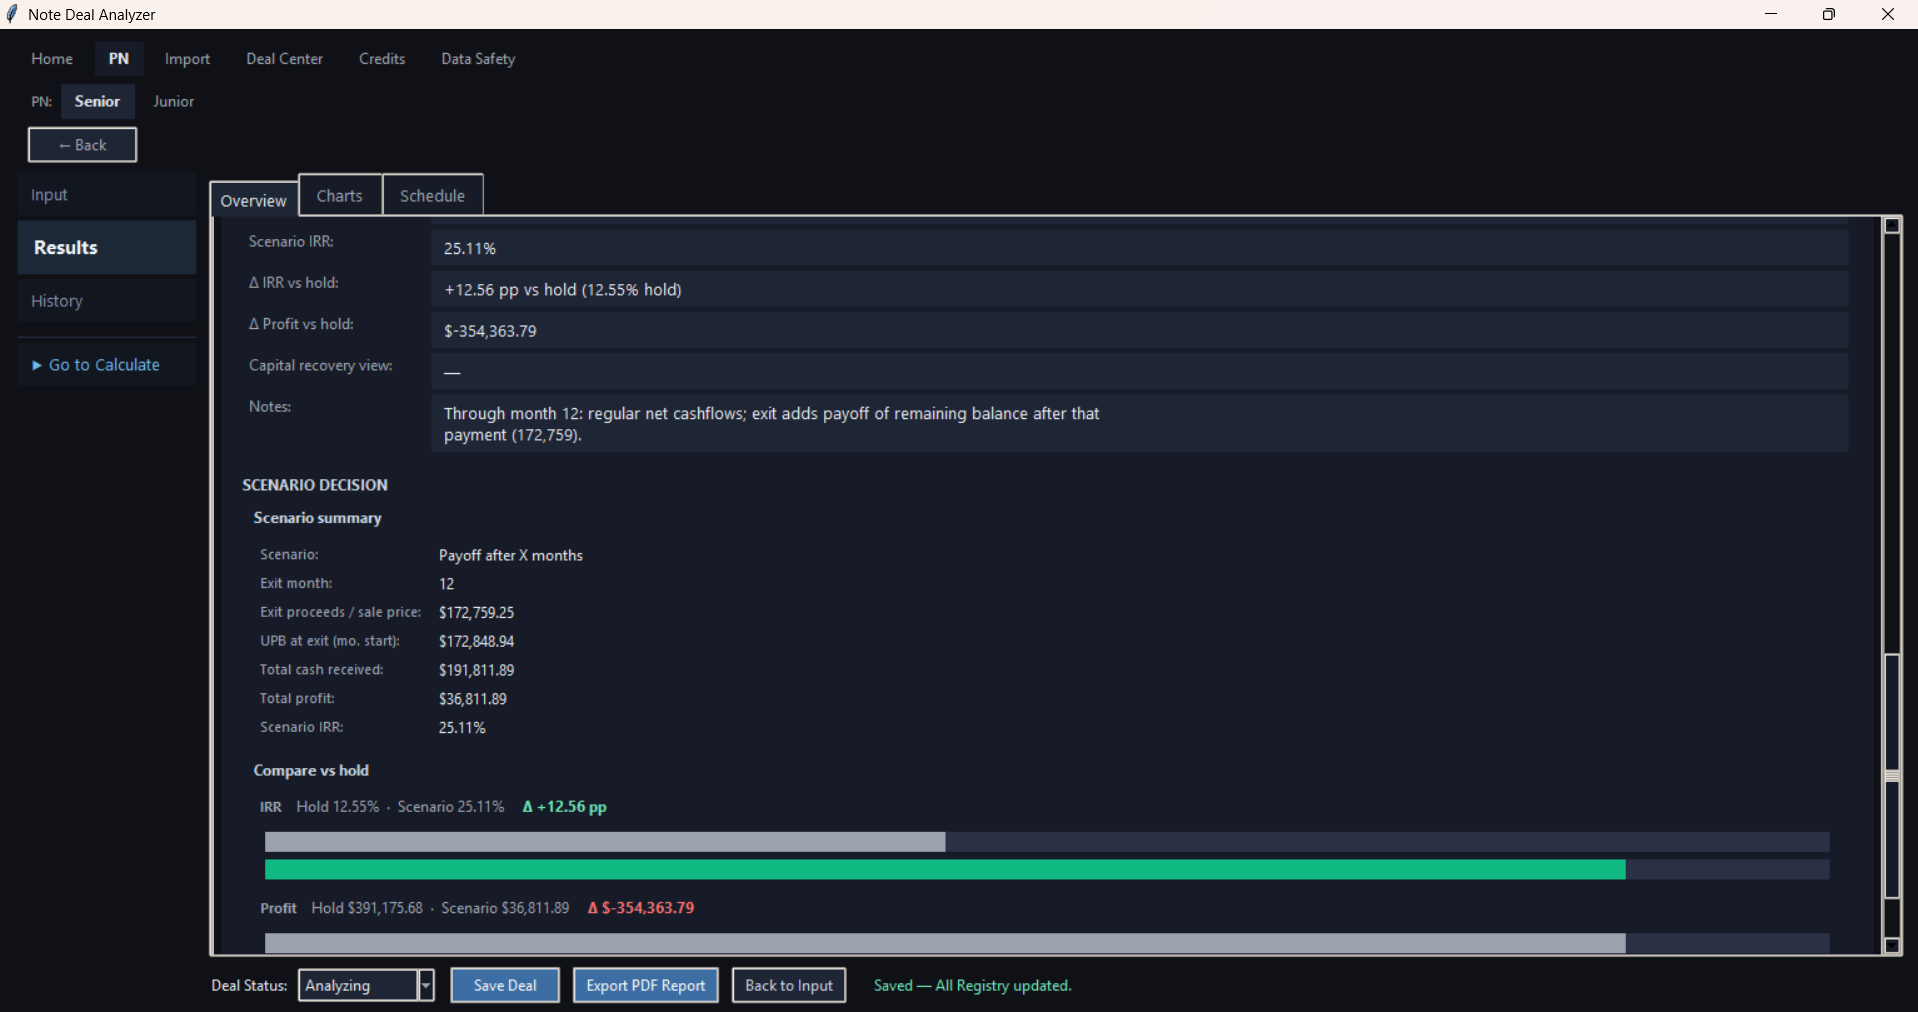
Screenshot: Results - payment analysis detail
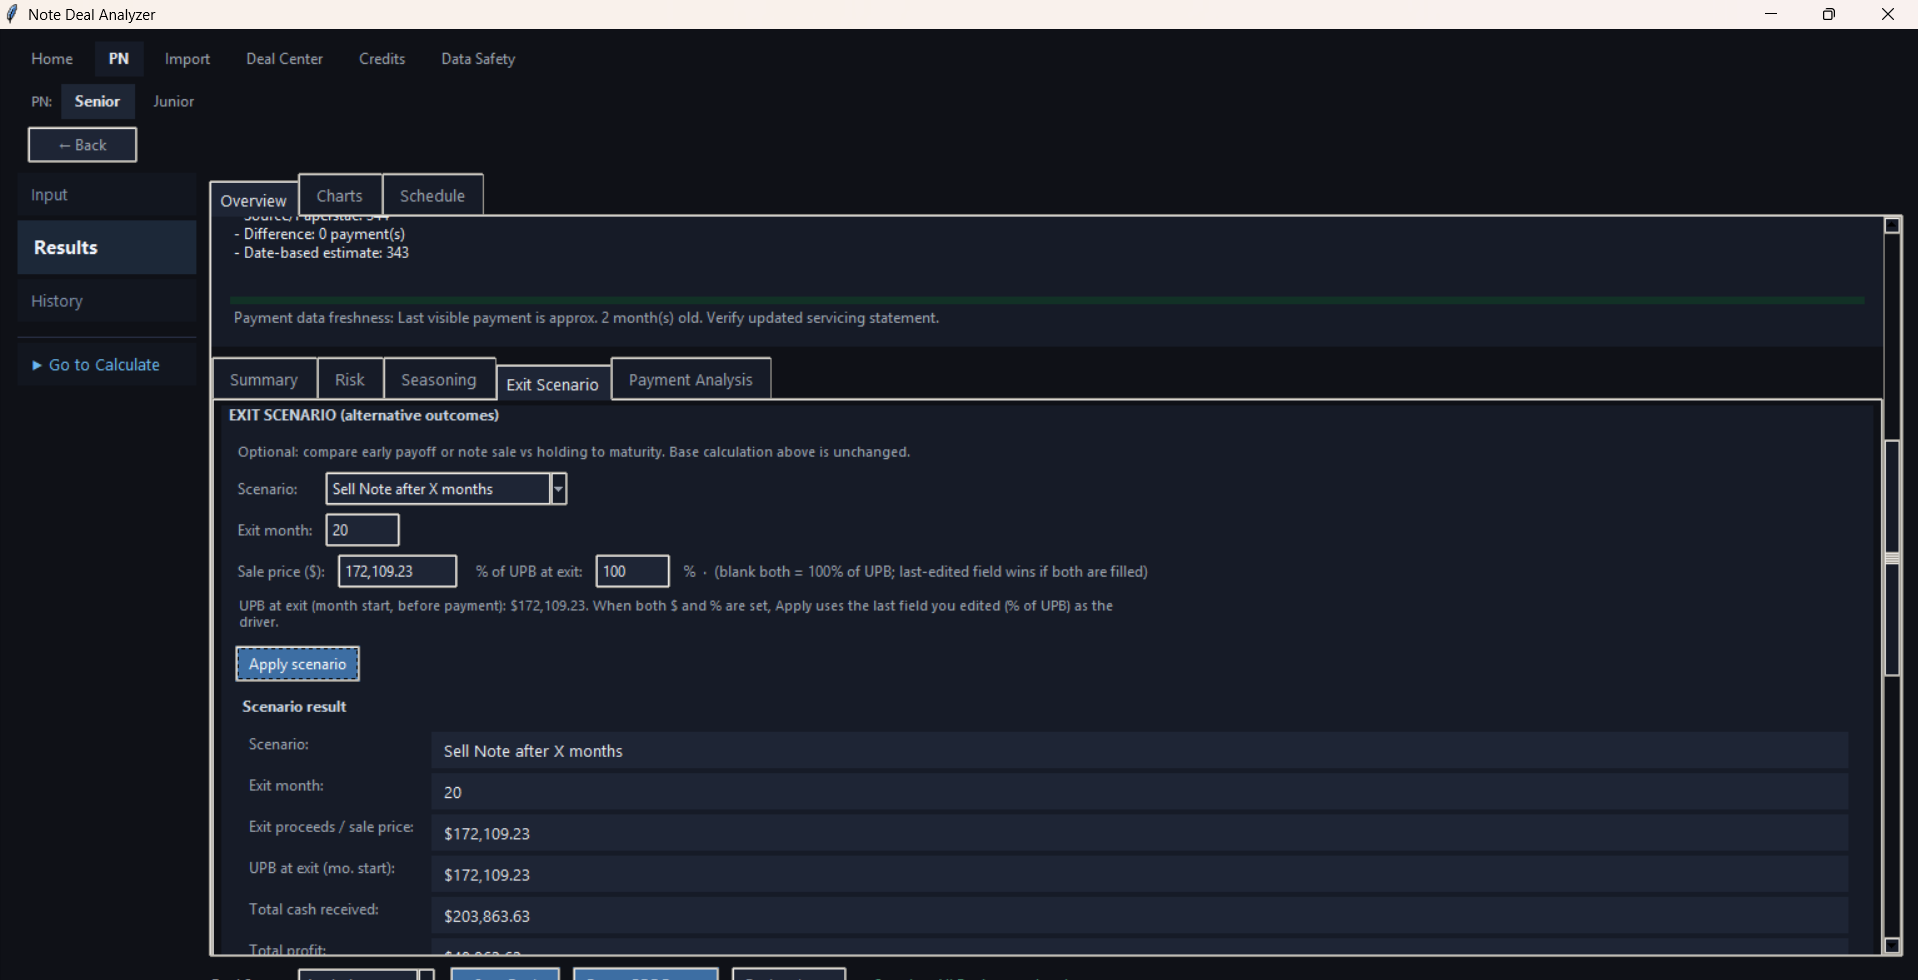
Screenshot: Results - payment history detail
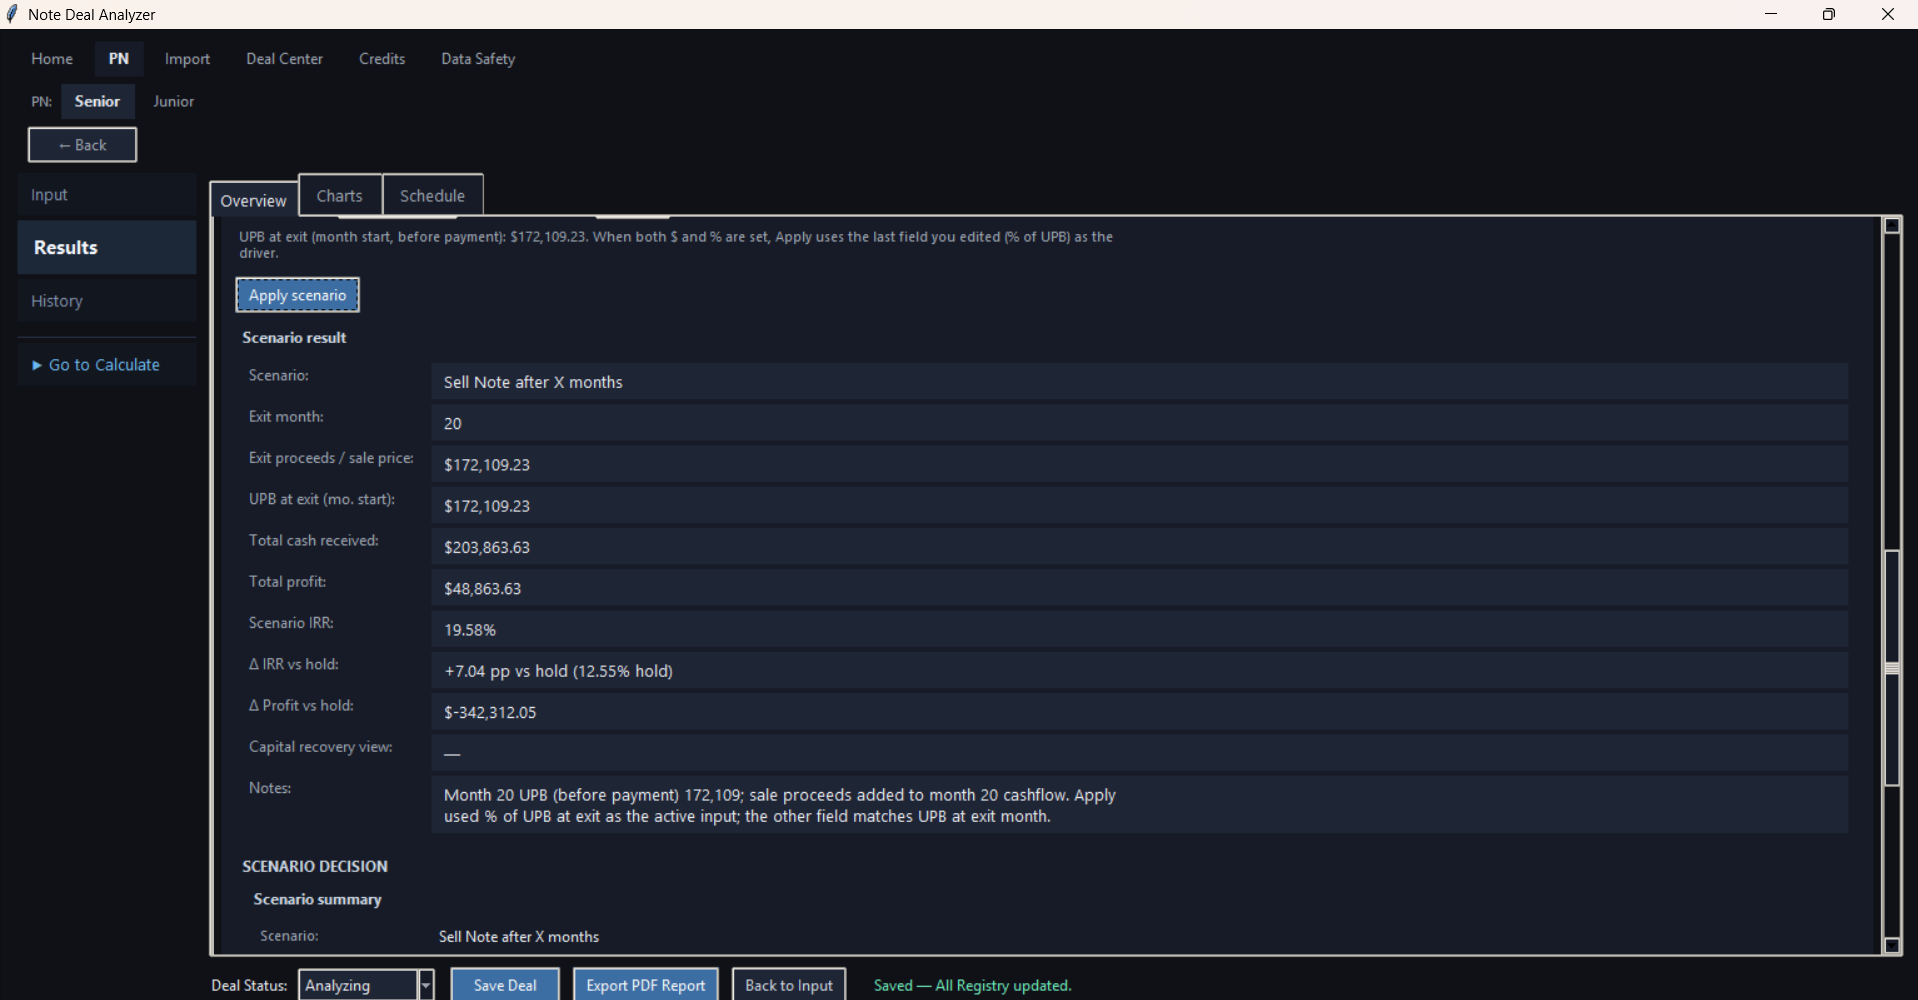
Screenshot: Results - warnings and validation notes
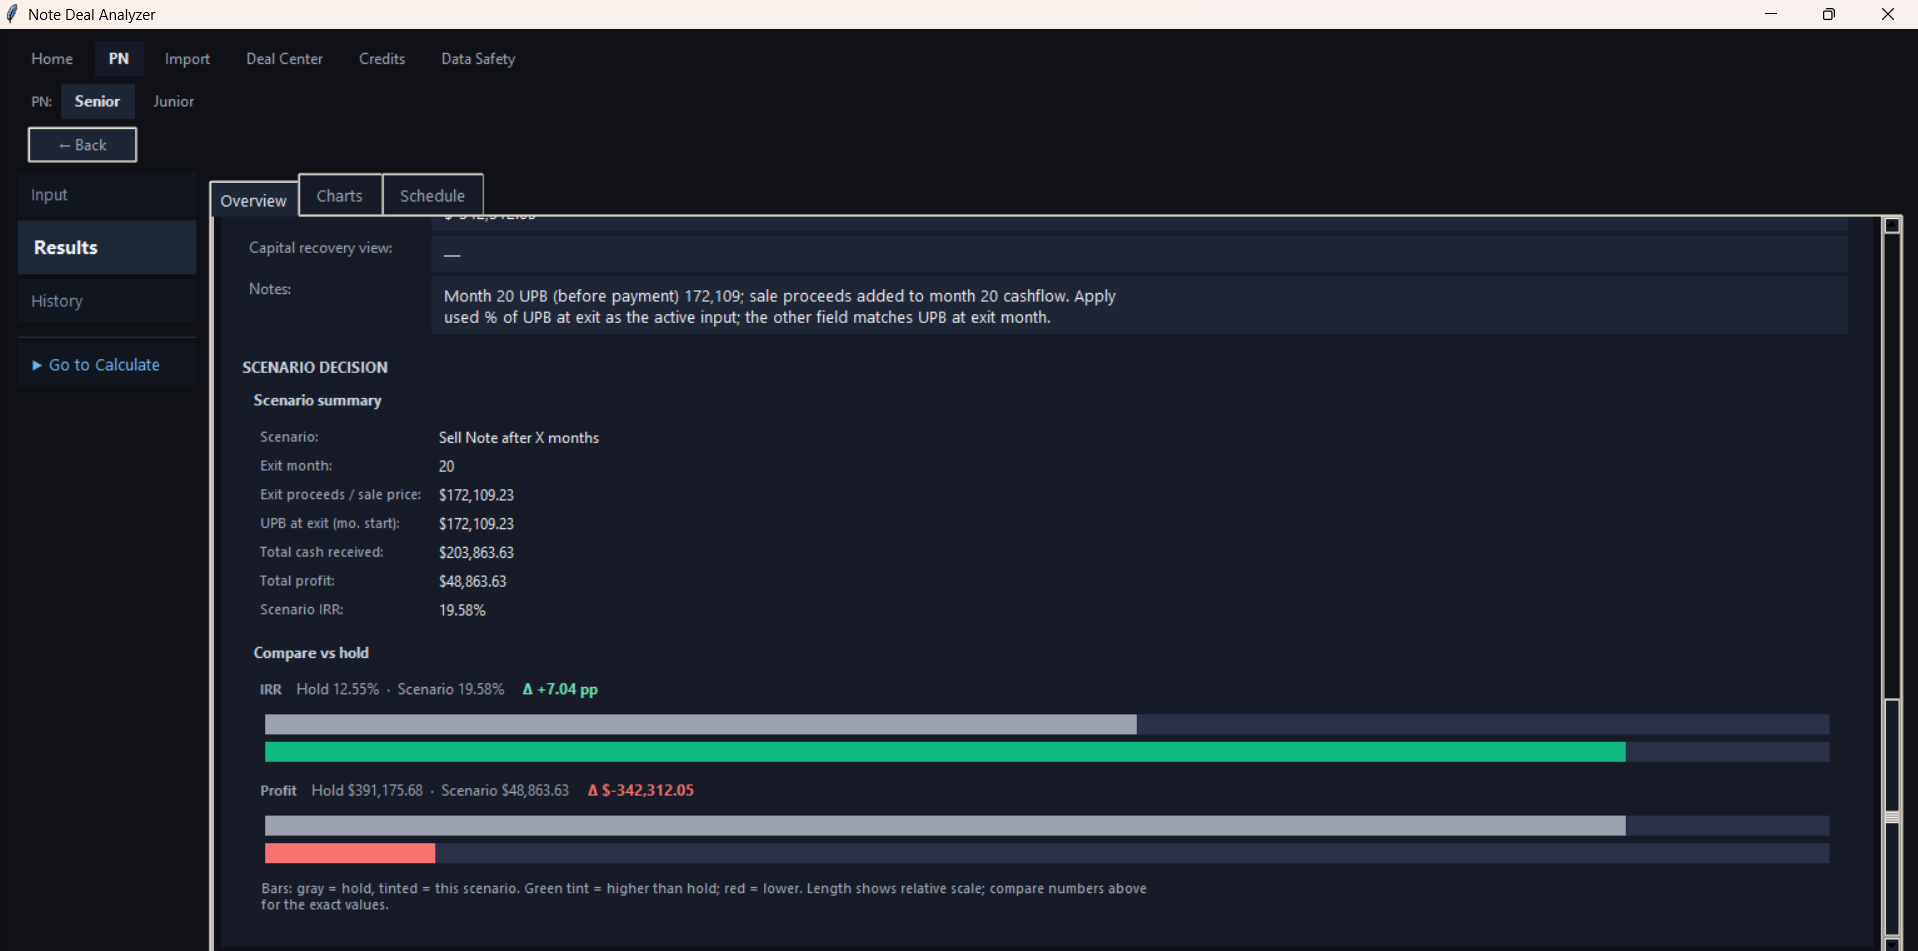
Screenshot: Results - schedule table
Screenshot: Results - payment history / transactions table
| After Calculate checklist Review result summary. Review payment/history sections if available. Review warnings or missing data notes. Set deal status if useful. Save Deal. Export PDF Report if needed. |
|---|
Save Deal stores the current analysis in All Registry and History. Save Deal does not use a credit.
PDF Export creates a report from current results. PDF Export does not use a credit.
Back to top11. Data Safety
Screenshot: Data Safety screen
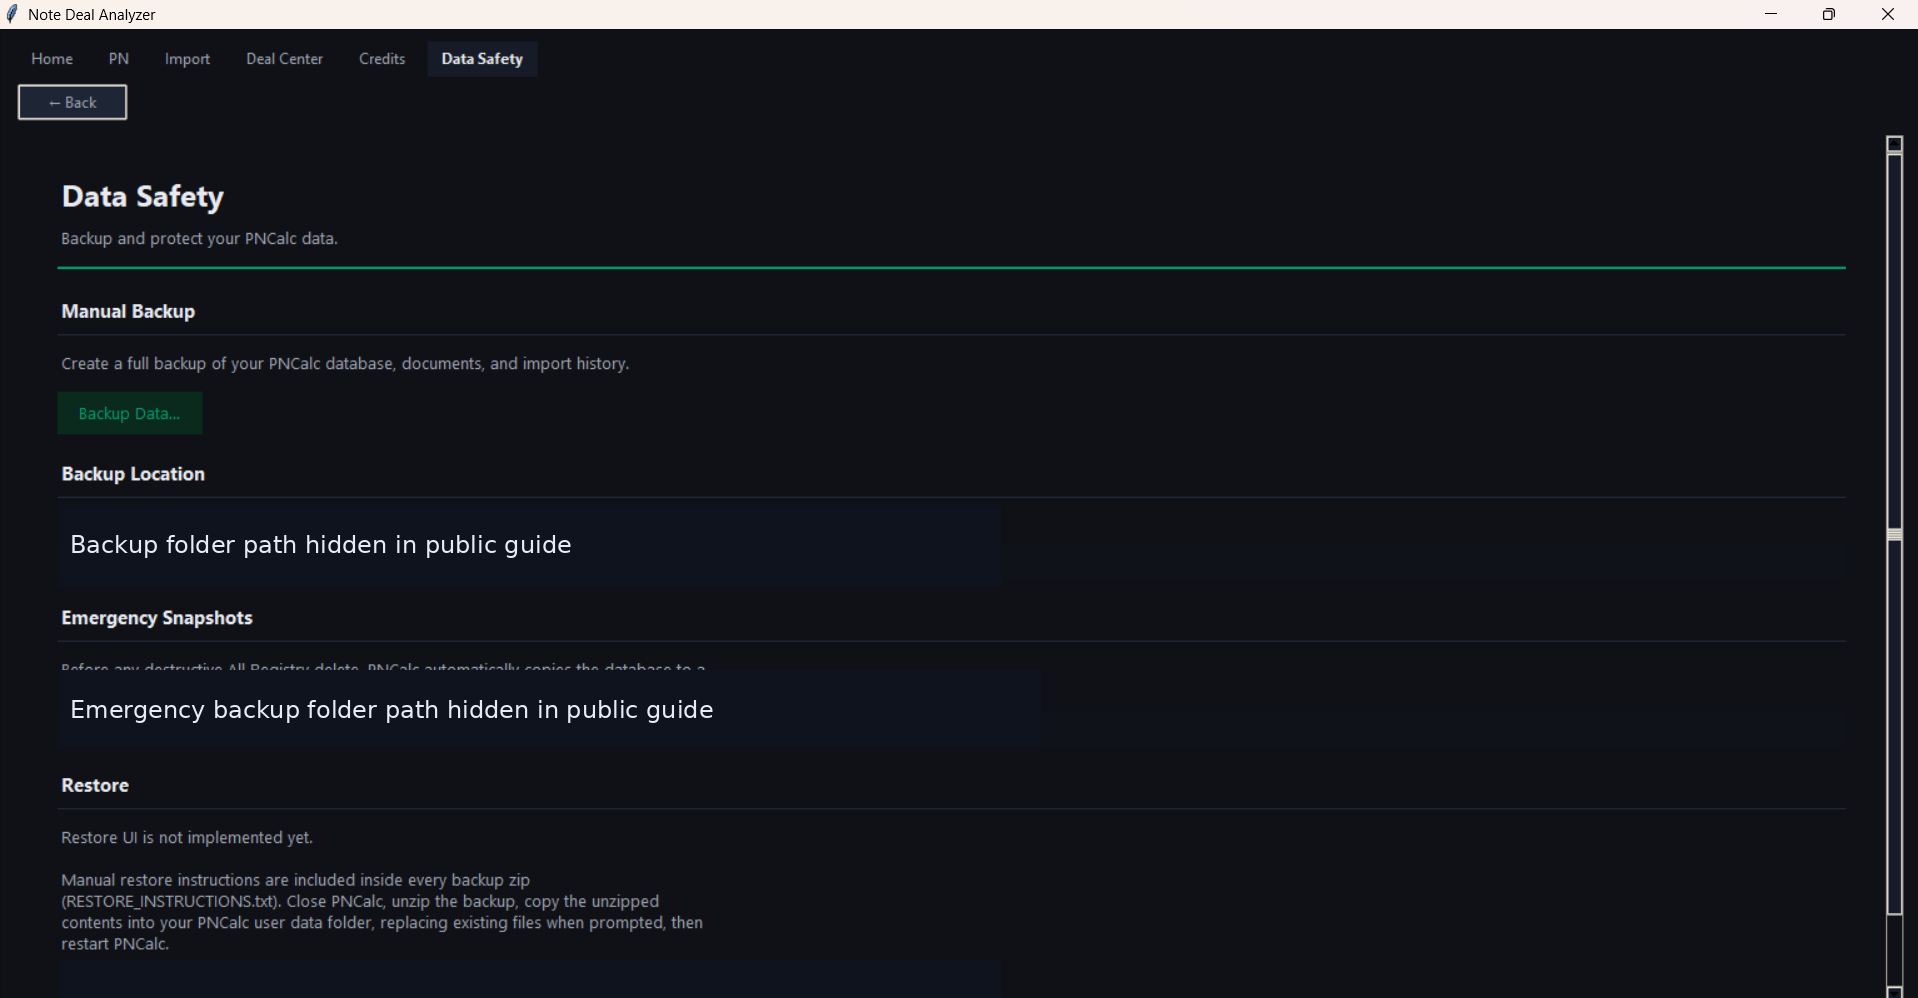
- Use Backup Data to create a manual backup.
- Review the backup location shown on screen.
- Read restore guidance shown in the app.
- Use backups before cleanup, major changes, or moving to a new computer.
12. Navigation Safety: If You Are Not Sure Where You Are
- Use Back to return to the previous screen.
- Use Home to restart from the main navigation if available.
- Use Deal Center to find deals again.
- Use Credits only for license and credit status.
- Use Import only for loading and moving source rows.
- Use PN Input for assumptions and Calculate.
- Use Calculate only after reviewing fields.
13. Button Reference
| Order | Screen | Button / Control | What it does | When to use it | Uses credit? | Expected result |
|---|---|---|---|---|---|---|
| 1 | Credits | Activate | Activates the entered license key. | After receiving a valid license key. | No | License activates and credit fields update. |
| 2 | Credits | Refresh | Gets latest license and credit status. | When confirming current balance. | No | Credit balance updates. |
| 3 | Import | Load Paperstac CSV | Loads a Paperstac CSV into preview. | When reviewing a Paperstac file. | No | Rows appear in preview. |
| 4 | Import | Load JKP workbook/CSV | Loads a JKP workbook or CSV into preview. | When reviewing a JKP file. | No | Rows appear in preview. |
| 5 | Import | Clear file | Clears the loaded preview file. | When starting over. | No | Preview resets. |
| 6 | Import | Select visible rows | Selects currently visible preview rows. | Before importing a filtered group. | No | Visible rows are selected. |
| 7 | Import | Clear selection | Clears selected rows. | When selection should be reset. | No | Row selection clears. |
| 8 | Import | Remove selected from preview | Removes selected rows from current preview. | When rows should not move forward. | No | Rows are removed from preview only. |
| 9 | Import | Inspect selected row | Opens details for a selected row. | Before importing uncertain rows. | No | Row details are shown. |
| 10 | Import | Import selected to All Registry | Moves selected rows into All Registry. | After selecting rows to keep. | No | Rows are available in Deal Center. |
| 11 | Deal Center | Refresh | Reloads current deal list. | After import, save, or status changes. | No | List updates. |
| 12 | Deal Center | Open selected deal | Opens the selected deal. | When continuing analysis or reviewing saved results. | No | Deal opens in PN workflow or saved results. |
| 13 | Deal Center | Set Analyzing / Set Shortlisted / Set Passed | Updates selected deal status. | During triage. | No | Status updates. |
| 14 | PN Input | New Deal | Starts a new deal entry. | When beginning manual entry. | No | New input workflow starts. |
| 15 | PN Input | Clear | Clears current input fields. | When starting over. | No | Input fields clear. |
| 16 | PN Input | Calculate | Runs calculation from current assumptions. | After reviewing required fields. | Yes, after success | Results appear and 1 credit is used. |
| 17 | PN Junior | Run preliminary analysis | Runs preliminary PN Junior analysis. | When senior data is missing and preliminary mode is appropriate. | Yes, after success | Preliminary results appear. |
| 18 | Results | Save Deal | Saves analysis to All Registry and History. | After reviewing results. | No | Deal analysis is saved. |
| 19 | Results | Export PDF Report | Creates a PDF report from results. | When report output is needed. | No | PDF is saved. |
| 20 | Data Safety | Backup Data... | Creates a manual backup. | Before cleanup or major changes. | No | Backup is created. |
| - | Navigation | Back | Returns to previous screen or hub. | When leaving a screen. | No | Previous screen opens. |
14. Common Problems
License key not accepted: This applies to Windows website purchases. Check that the key was entered correctly and that your internet connection is working. Try Activate again. If it still fails, contact support.
Credits not updating: Click Refresh on the Credits screen. If the balance still does not update, check your internet connection and contact support.
No credits remaining: Windows customers purchase another pack on the website. Mac customers purchase another pack inside the app using Apple In-App Purchase. Already calculated saved results can still be opened without using a credit.
Imported deal not visible: Open Deal Center and click Refresh. Check All Registry, PN1 Queue, and PN2 Queue. Review-only records may not appear in PN queues.
Calculation cannot run: Review required input fields. The app may block calculation if required data is missing, invalid, the license is inactive, or credits are unavailable.
PDF export issue: Make sure results exist first. Choose a normal user folder where you have permission to save files.
Internet connection issue: License activation, in-app purchase, and credit refresh require internet access. Check your connection and try again.
When to contact support: Contact support if activation fails repeatedly, credits look incorrect after Refresh, calculations produce unexpected errors, or the app cannot open saved work.
Back to top15. First-Use Checklist
- Open the app.
- Go to Credits.
- Windows: enter your license key and click Activate.
- macOS: choose a credit pack and complete Apple In-App Purchase if you need credits.
- Click Refresh.
- Import a deal or enter one manually.
- Open the deal.
- Review fields.
- Confirm credits are available.
- Click Calculate.
- Review results.
- Click Save Deal.
- Export PDF if needed.
16. Customer Glossary
| Term | Simple meaning |
|---|---|
| Credit | A unit used to run one successful Calculate action. |
| License Key | Windows: the key you enter to activate your purchased plan. macOS customers buy credits in the app and do not use a website license key. |
| Activate | Checks and turns on your license inside the app. |
| Refresh | Updates the app with the latest license and credit balance. |
| Calculate | Runs the deal analysis from the current input assumptions. |
| PN1 / PN Senior | The senior note analysis workflow, usually for first-lien deals. |
| PN2 / PN Junior | The junior note analysis workflow, usually for second-lien deals. |
| Deal Center | The central place to find imported, saved, and analyzed deals. |
| All Registry | The full list of deals saved or imported into the app. |
| PN Queue | A filtered list of deals intended for PN Senior or PN Junior analysis. |
| PN Input | The screen where deal fields and assumptions are reviewed or entered. |
| Results | The screen that shows calculated deal metrics after Calculate. |
| Save Deal | Saves the current analysis without using another credit. |
| PDF Export | Creates a PDF report from saved or current results. |
| Data Safety | The screen for backups and restore guidance. |
| Imported Deal | A deal brought into the app from a supported source file. |
| Saved Result | An analysis result saved so it can be reopened later. |